Rookout is now a part of the Dynatrace family!

Table of Contents
Get the latest news

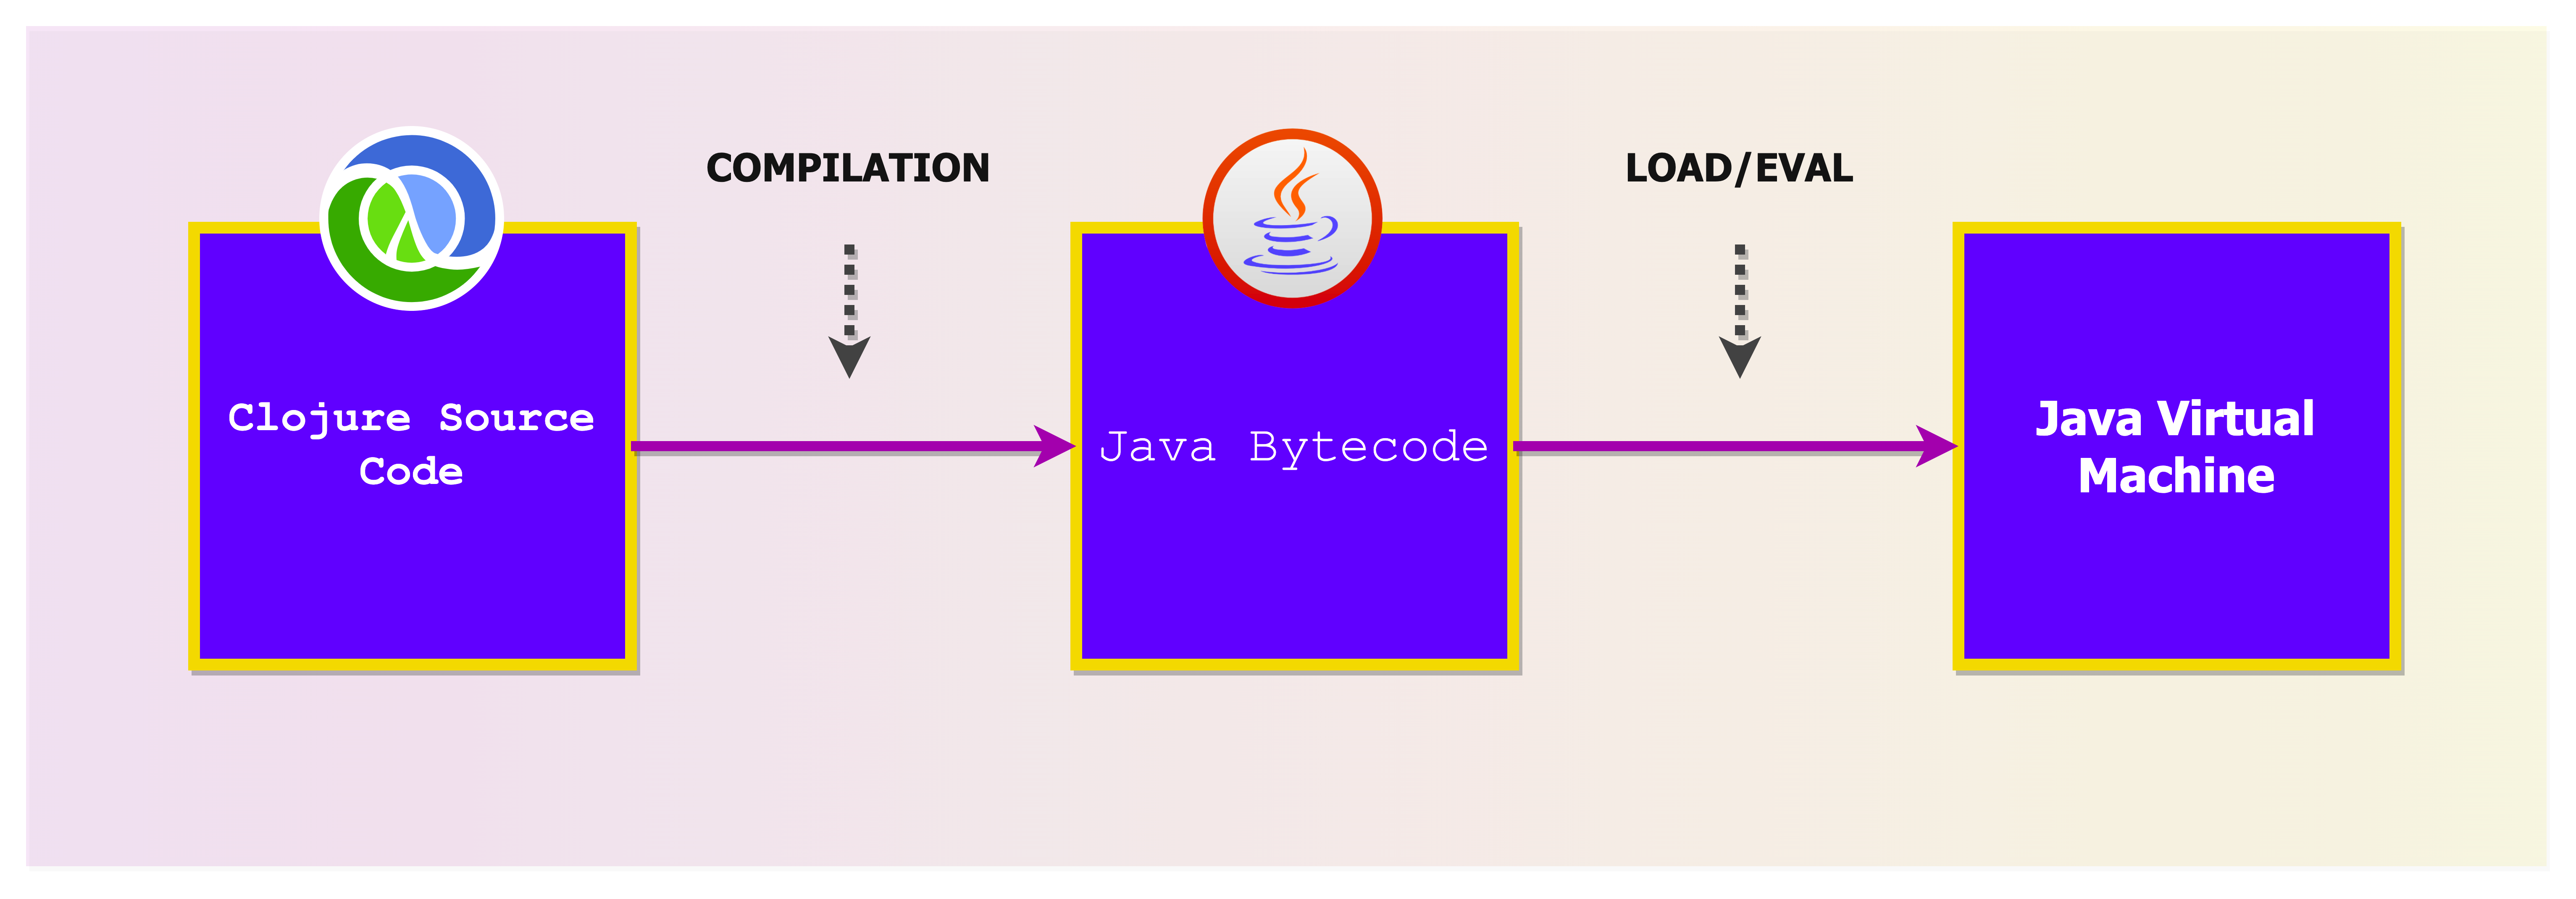
The Essential List of Spring & Spring Boot Annotations for Getting Started and Configuration

Gedalyah Reback | Senior Product Marketing Manager

7 minutes

Table of Contents

Spring Boot has made the Spring Framework more accessible than it already was. It is a streamlined form of the larger Spring Framework. For one, Spring uses manual configurations while Spring Boot contains a number of default config templates. Spring has a number of dependencies; Spring Boot, not so much (at least until build time). Auto-configuration makes it easy to get started with the Spring Framework (or even Java overall if you’re a true novice to coding) and the support community is huge.

One of the more overwhelming elements of Spring and Spring Boot is the extremely long lists of classes and annotations that exist. The documentation is extremely thorough, but complex.

There is also mapping out (in your own mind) what works at a method level and what works at a class level; should something be defined specifically as a bean or component (we’ll get to those soon); and what needs to be annotated and what doesn’t.

This is just a selection of the many annotations Spring Boot and Spring have, with a focus on the basics, configurations, and testing.

Basic Spring & Spring Boot Annotations

@Bean – This is the #1 concept to know in Spring. A bean is an essential component of any Spring-based application. That is the most basic understanding. That being said, you should consider more advanced understandings of what actually constitutes or should be defined as a bean. There is the definition from the Spring docs:

“In Spring, the objects that form the backbone of your application and that are managed by the Spring IoC container are called beans. A bean is an object that is instantiated, assembled, and otherwise managed by a Spring IoC container.”

IoC refers to “inversion of control.” Basically, you define control by declaring dependencies. This is why IoC containers are often also called a “dependency injection container” (or simply ‘DI containers’). There are two kinds of containers: the simpler BeanFactory and more extended ApplicationContext (which includes capabilities like Spring AOP, a web app layer, event propagation, and message handling.

Stereotype Annotations and Bean Configurations

The automatic dependency injection connecting these components and their dependencies – in other words, between the beans – is called autowiring. Spring will use beans at their designated time based on what stereotype annotations you set. Here are some of those stereotype annotations:

  • @Component – Annotates class as a component. Brass tacks, @Bean only declares something a bean; @Component detects and configures them.
  • @ComponentScan – Configures component scanning @Compenent, @Service, @Controller, and @Repository
  • @Service – Creates beans on the Service layer
  • @Repository – Creates beans for repos on the DAO layer
  • @Controller – Creates beans on the Controller layer
  • @RestController – Marks annotated class as a @Controller bean and adds @ResponseBody to serialize returned results as messages

@SpringBootApplication – This annotation combines calls made by the following 4 annotations:

  • @Configuration – Marks annotated class as a Java configuration defining beans
  • @SpringBootConfiguration – Indicates Spring Boot application <code>@Configuration
  • @EnableAutoConfiguration – Enables ApplicationContext auto-configuration to provide possibly needed beans based on the classpath
  • @ConfigurationProperties – Note that @ConfigurationPropertiesScan will auto-detect @ConfigurationProperties classes

Properties

@Autowired – This marks something to be autowired

@Configurable – This annotation indicates something is eligible for configuration

@Qualifier – This can explicitly name a bean (field or parameter in this case) eligible for autowiring

@Value – Indicated a default value for a parameter

@Lookup – This simply defines the <span style="font-weight: 400;">lookup</span> parameters

Conditional Spring Boot Annotations

There are a number of specific conditionals listed below. However, by no means is this an exhaustive list. In fact, you should assume the full list of conditional annotations will see constant updates, so make sure to refer to the docs if you need a very comprehensive list of options beyond these common and core condition annotations.

@Conditional – Of course, the first one we need to mention is @Conditional. This conditions the implementation of a bean, based on any of the defined conditions under this annotation.

Base a condition on if a specific class, bean, or web application exists or not:

  • @ConditionalOnClass & @ConditionalOnMissingClass
  • @ConditionalOnBean & @ConditionalOnMissingBean
  • @ConditionalOnWebApplication & @ConditionalOnNotWebApplication

@ConditionalOnProperty – This conditions creating an object or service on the value of a config property.

@ConditionalOnExpression – This conditions creating an object or service on an expression (i.e., a combo of sub-conditions).

@ConditionalOnJava – This annotation is clever. Considering you could be running different versions of Java, you may or may not want to run certain services depending on the version of Java you’re on. So, you can condition a new service on having a given version:

@Service
@ConditionalOnJava(JavaVersion.SIXTEEN)
class LogFactoryNotFactorial {
    // ...
}
@Service
@ConditionalOnJava(Range.OLDER_THAN, JavaVersion.SEVENTEEN)
class LogFactory {
    // ...
}

Web AnnotationsYou can also specify a range of versions using ConditionalOnJava.Range, followed by values, as well as additional parameters EQUAL_OR_NEWER or OLDER_THAN.

@RequestMapping is the original mapping annotation for Spring to map any and all HTTP request URLs. They provided the request methods with that information, Spring 4.3 introduced specific notations for those specific calls:

  • @GetMapping (by the way, there is an identical annotation in Spring’s GraphQL API package)
  • @PostMapping
  • @PutMapping
  • @DeleteMapping
  • @PatchMapping

@RequestParam – This accesses the parameters of HTTP requests, while @RequestBody maps the body of the request.

@GetMapping("users")
public @ResponseBody ResponseEntity<List<User>> getAll() {
        return new ResponseEntity<List>(userService.getAll());
}

@GetMapping("users/{id}")
public @ResponseBody ResponseEntity<User> getById(@RequestParam(user = "id")

Testing & Validation

@SpringJUnitConfig is a composed annotation that combines the following two annotations:

  • @ExtendWith from JUnit Jupiter, which defines extensions for tests, and …
  • @ContextConfiguration from the Spring TestContext Framework, which defines class metadata and how to configure an <span style="font-weight: 400;">ApplicationContext</span>

@SpringJUnitWebConfig goes even further by adding a third annotation to the above: @WebAppConfiguration.

@TestPropertySource– This defines the locations() of properties() to add to PropertySources

@DirtiesContext – This indicates that an <span style="font-weight: 400;">ApplicationContext</span> should be closed and removed from the context cache (<a href="https://docs.spring.io/spring-framework/docs/current/javadoc-api/org/springframework/test/context/cache/package-summary.html"><span style="font-weight: 400;">ContextCache</span></a>). In other words, it’s ‘dirty.’ If a test modifies the state of some bean, database, or object, then this will indicate the context should be ‘cleaned’ and replaced with a new context.

@Sql – designates a test class or test method used to configure SQL scripts and statements for tests. There are related annotations:

  • @Sqlconfig defines metadata for parsing those SQL scripts.
  • @SqlGroup aggregates multiple @Sql annotations, while
  • @SqlMergeMode is used when both 1) method-level and 2) class-level @Sql declarations are merged together.

@EnabledIf and @DisabledIf define when a test class or method should be enabled.

@ActiveProfiles – Declares which active bean definition profiles to use in <span style="font-weight: 400;">ApplicationContext</span>. This is only one of the annotations that are part of the Spring TestContext Framework.

@SpringBootTest – This annotation will load an entire ApplicationContext – all layers – for testing

@WebMvcTest – Load ONLY the web layer

@DataJpaTest – Load ONLY the JPA components

@Mock – Defines something as a mock, or a mock object.

@MockBeanMarks something as a mock and loads it as a bean in <span style="font-weight: 400;">ApplicationContext</span>

@Valid – Mark nested properties for validation at the method level (method parameters and fields)

@Validated – Mark properties for validation at the class level as part of group validation

Other test annotations include @Commit, @Timed, @Repeat, @Rollback, @DirtiesContext, @IfProfileValue, and @ProfileValueSourceConfiguration.

Springing Forward

You’re not going to find anyone giving you a “complete” list of Spring Boot annotations outside of the massive Spring Boot Docs index. That being said, Spring and Spring Boot constitute a compendium of streamlined options for Java developers who want to make something quickly.

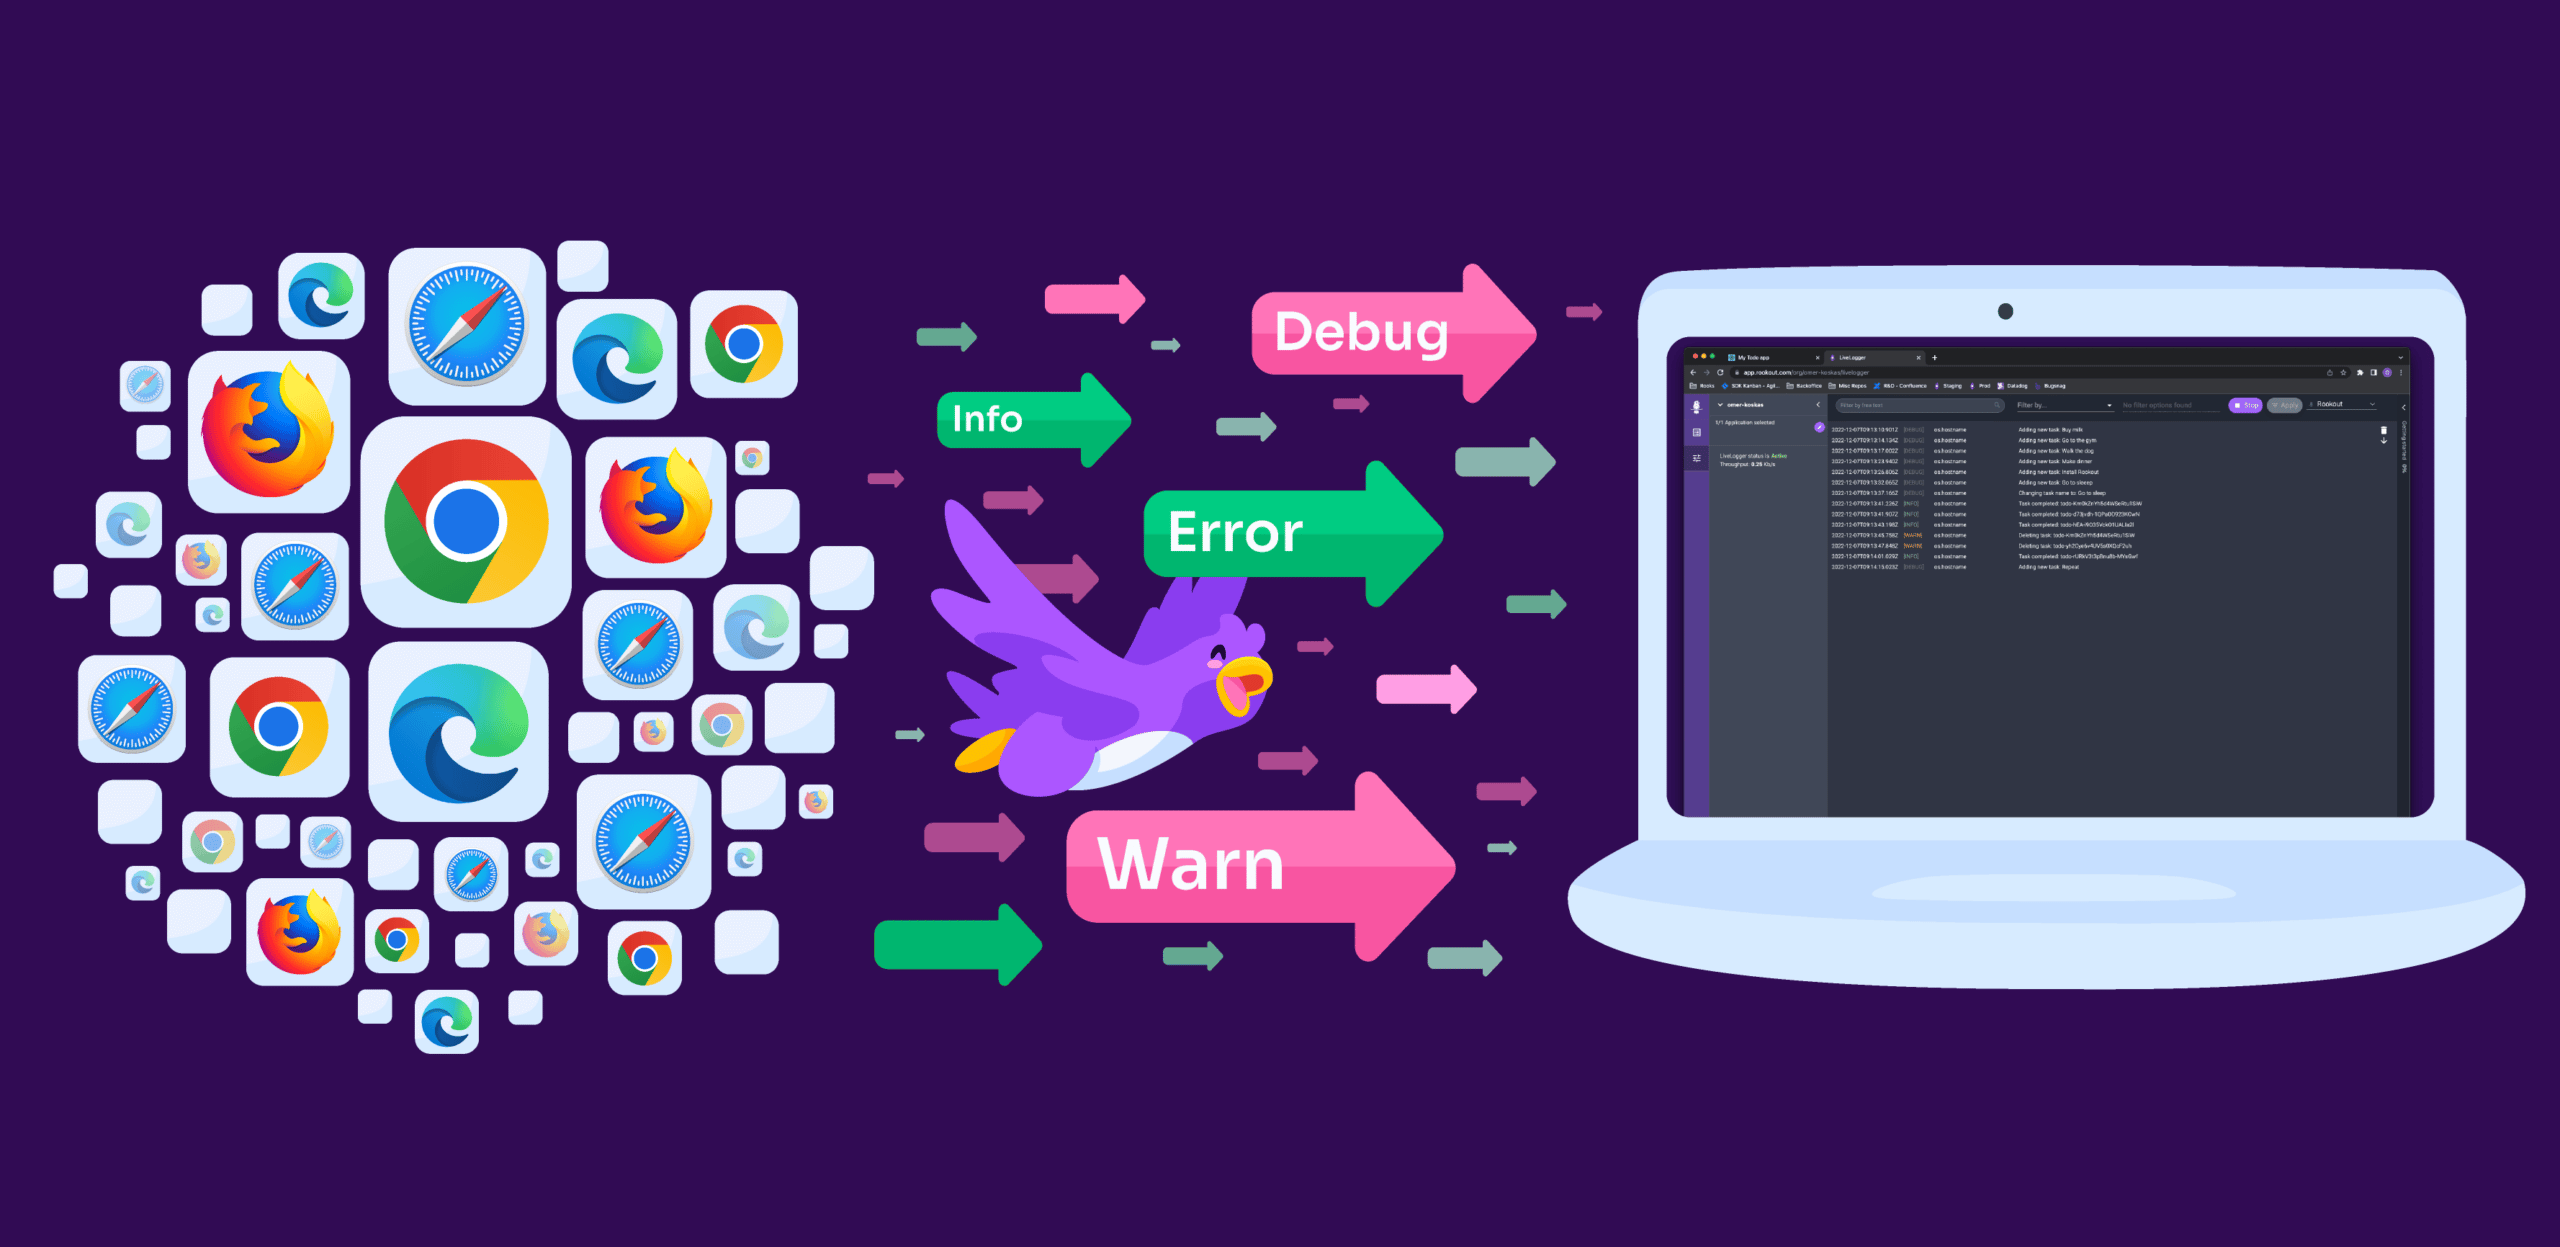
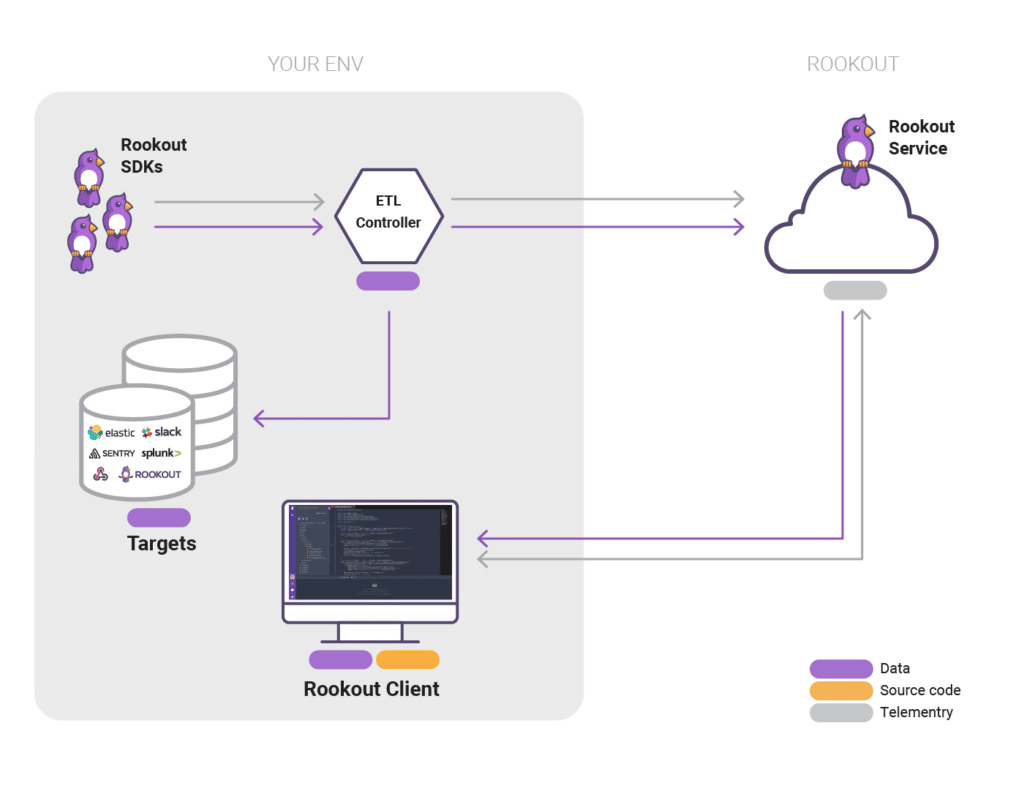
There are more domains to cover in Spring, including troubleshooting. When it comes to observability and debugging Spring Boot apps, Rookout is one of the tools that you can use to help you out.

Whether they are just starting out, testing an idea, or creating something for a tutorial, the rigid and expansive list of annotations and classes is a gift for the Java ecosystem that keeps on giving.

Rookout Sandbox

No registration needed

Play Now

Table of Contents
Get the latest news

GitLab Debugging with Auto Fetch Feature for Correct Versioning

Noa Goldman | Senior Product Manager

3 Minutes

Table of Contents

Developers update and augment their stacks all the time. No configuration is permanent, and a new tool can enter the picture at any given moment. The reasons vary, but new applications’ addition to the mix can upset your integrations from time to time, particularly if you’re adding security tools.

Rookout is always aiming to support a fluid experience, and that’s what is behind our latest updates to our Gitlab integration. With the Auto Fetch feature, Rookout accesses and instantly imports source code in a fast, secure way that relies on existing authentication flows.

GitLab’s Features

Gitlab is a code repository host with its main advantages being internal CI/CD abilities like Auto Devops, subgroups (within larger groups/organizations), and saving changes takes far less time. CD can be set up through Docker, Kubernetes, or shell, with runner setup directly from GitLab’s UI.

Other advantages it boasts are keeping backups on the same server and making it available as a CLI utility; zero-downtime upgrades, horizontal scaling, and high availability. It also has a feature called Epics, a cross-project form of issue-tracking that can track certain topics or themes across different projects.

It also offers project management, so it’s becoming popular with devs that are less than thrilled with using Jira. On the security side, it has scanning tools for cluster images, containers, and IaC configuration.

Auto Fetch: Correct Versioning Every Time

The integration streamlines the GitLab debugging process. With one-time authentication via the GitLab API, accessing and debugging code stored in one of the site’s repos turns into a seamless experience. Code import straight away into the Rookout UI, where you can add breakpoints to specific lines of code.

Making all this seamless requires a finely honed tool. This is where Rookout’s Auto Fetch feature comes into play. The seamlessness isn’t a luxury – it excises an oft error-prone manual opening of source code. We developed the Auto Fetch after seeing customers losing time and going down rabbit holes trying to resolve errors in the wrong versions of their source code. The change has been immense since its introduction, becoming an indispensable tool for our users when working with any code repository.

Rookout syncs with the version info to fetch and commit to that correct version any and all changes you plan to make.

Setting up Auto Fetch is pretty straightforward. Use the following environment variables while deploying Rookout:

  • <span style="font-weight: 400;">ROOKOUT_COMMIT</span> – String that indicates your git commit
  • <span style="font-weight: 400;">ROOKOUT_REMOTE_ORIGIN</span> – String that indicates your git remote origin

Once configured, the source code within that given instance will load automatically when that instance is selected. On the Application Instances screen, you’ll see Revision and Source origin fields with the values that you set.

Source Origin & Revision are visible here

Now, when you choose to debug an application instance where these environments variables are set, you can immediately start debugging because Rookout will fetch and display that source code unprompted. You should see the text “(auto loaded)” in parenthesis next to your repository when this happens successfully:

When the code is auto loaded, you'll see it noted in Rookout

When the code is auto loaded, you’ll see it noted in Rookout

Conclusion

As GitLab expands its footprint, the deepened integration will make workflows easier for its many Rookout users. Features like Auto Fetch answer the call for more instantaneous and seamless transitions between multiple panes of glass when testing and debugging source code.

Rookout Sandbox

No registration needed

Play Now

Table of Contents
Get the latest news

What is Clojure? Functional Programming for the Java Ecosystem

Gedalyah Reback | Senior Product Marketing Manager

5 minutes

Table of Contents

Most programming languages are built on procedural programming, but there is this niche of dialects built for “functional programming,” where code classes are dynamically created based on the rules in the functions you write. If you could put languages on a scale of most procedural to most functional, you’d find Clojure sitting at the edge of the latter. What is Clojure? Who uses Clojure? What’s the best Clojure use case? And what does Rookout has anything to do with Clojure debugging?

Why Choose Clojure?

If you want to get all the benefits of using a JVM and also rely on a modern functional programming language, while also getting an extremely enthusiastic support community, well then Clojure is the language for you. You can also look at this mindmap that one community member shared on Reddit several months ago:

Mindmap by u/viebel (via Orgpad)

Mindmap by u/viebel (via Orgpad)

Firstly, a quick rundown of functional programming languages. No language is purely functional or purely not. Functional is just one of several programming paradigms alongside object-oriented programming, procedural, imperative, declarative, and others.

Here is a list of major functional language examples: Clojure, Haskell, SML, Scala, Erlang, Clean, F#, ML/OCaml, Lisp / Scheme, XSLT, SQL, and Mathematica. Some other programming languages – Javascript, Java, Python, Lua – also support pure or near-pure functional programming.

Clojure is as close to purely functional as languages get. Mainly functional Lisp can work across paradigms, while primarily imperative C# is also general-purpose and applies across the board.

Clojure’s Enthusiastic Community

There aren’t many languages in popular use that have limited paradigm range. But Clojure does enjoy a sizeable user community. A decent 2.25% of the professional developers that responded to Stack Overflow’s 2021 Developer Survey had used Clojure (which is actually up from 2019, but more people answered the question that year).

But that’s nothing to its actual popularity. A whopping 81.2% said they “loved” the language – that is up from 68.3% in 2019! It ranks 2nd place behind Rust. That raises an obvious question – WHY? Notwithstanding that some devs actually compare the Clojure community to a cult (no seriously, a lot of Clojure enthusiasts also wonder this), what is the main appeal of Clojure?

The Clojure community is small but tight. You can get support from that community at portals Ask Clojure, ClojureVerse and the Google Group. There are also Clojure-specific IDEs: Calva (for Visual Studio Code), Cursive, and CIDER with adding interactive programming support to Clojure development. Popular Projects include HTTP routing library Compojure; REST API framework Liberator, and HTTP API framework Pedestal.

Adapting Functional Programming to Java

A big theme is efficiency: It utilizes the JVM ecosystem without depending on Java; it’s a dialect of a wider-known language Lisp.

Clojure to JVM

Clojure source code to Java bytecode to JVM

So let’s swim a little bit deeper. Clojure does have some relatability to Java, a procedural language. That procedure is the compilation of code, also called a class. Java has got a lot of class. Clojure…erm, is pretty classless – at least at first. So when you run Java, the file opens; when you run Clojure, it relies on the functions in the code to generate a class file.

Now, this can be both awesome and awful, depending on your perspective. Functional programming in Java carries a huge learning curve with it for a lot of developers. Lisp syntax is particularly extreme when it comes to focus on functions.

“Hello, World!” in Clojure

Clojure syntax uses “S-expressions,” or lists grouped together inside of parentheses. It is scant on notation outside of the operator at the beginning of each expression. There are no infixes or suffixes.

You can see that here in the Clojure version of <span style="font-weight: 400;">Hello World!</span>:

(ns helloworld.core)

(defn -main

  "Program description"

  []

  (println "Hello, World!"))

You can find a number of other common coding examples, including the seemingly endless amount of ways to program Fizzbuzz.

Clojure Debugging

Debugging in the different IDEs and the language itself works through the REPL, or the Read-Eval-Print Loop used by the Lisp language. Within the Lisp REPL, you can “inspect and alter the flow of a running program” according to Clojure documentation.

The simplest method is to use Clojure’s print command <span style="font-weight: 400;">println</span> to output all of your code as it executes. That might not exactly be practical. More sophisticated approaches within REPL include using the SpyScope library, which includes three reader tools:

  1. spy/p – the “p” stands for “print”; it’s a less verbose approach to the <span style="font-weight: 400;">println</span> debug method
  2. spy/d – the “d” stands for “details”; adds time data, stack frames and other data
  3. spy/t – the “t” stands for “trace”

You can also approach it from with the Java Debugger within a compatible IDE or open-source trace-based library Debux (specially written for Clojure and ClojureScript). That being said, there can be a special curve to debugging Clojure’s functional programming style.

Knowing this, Rookout provides its own debugging services for Clojure. Adding Rookout breakpoints will likely streamline what can otherwise be a flustering manual debugging process in an already confusing language. You can see a brief demonstration of how it works in the GIF below:

Rookout debugging Clojure source code

Rookout debugging Clojure source code

On top of Clojure, Rookout also supports any of the JVM-supported languages like Kotlin, Scala, Groovy, and ColdFusion.

If you have a project using Clojure that needs a good bout of debugging, contact us for more details or sign up for a free trial.

Rookout Sandbox

No registration needed

Play Now

Table of Contents
Get the latest news

7 .NET New Features to Know Before Jumping Back In

Mohammed Osman | Guest Author

9 minutes

Table of Contents

Software development gets complex if you want your applications to target multiple operating systems, including but not limited to Windows, Linux, macOS, Android, iOS, HoloLens, desktop apps, and web apps. Enter the robust and feature-rich .NET platform to write applications rapidly for use across multiple systems.

It also contains many libraries that allow developers to reuse common functionalities. It isn’t itself a language, though many describe it that way. Moreover, the .NET platform supports several programming languages, namely C#, Visual Basic, C++, and F#.

.NET – polylingual now but originally a framework for C# – has waxed and waned in popularity over the 20-ish years it’s been on the market. Some of that is tied to the popular of C#, which has seen a steady rise in use over the last five years (according to tiobe.com):

It’s a complicated language, but its veteran status has given the market time to get used to its complexity. It is among the most used languages and highly in demand, giving a boost to .NET as the language and framework have both evolved to meet the particular demands of modern cloud-native applications.

That means there have been some big updates to .NET to keep that trend upward. In this article, you’ll learn about how .NET emerged and the revolutionary new .NET features are critical to its modern version.

A Brief History of .NET

.NET Evolution

Image concept adapted from dwmkerr.com

Before diving deep into the details of .NET, let’s take a look at how .NET emerged since its early days as the .NET Framework.

The .NET Framework was released in 2002 on version 1.0. After that, Microsoft released several increments of .NET 1.0 as the framework matured and gained more features. In 2005, .NET Framework 2.0 was released, followed by the .NET Framework 3.0 in 2006. Again, Microsoft released several patches until 2010, when they introduced .NET Framework 4.0 and continued to release several increments for that version as well. At that point in time, the .NET Framework ran only on Windows.

In 2004, the .NET Foundation introduced Mono Framework to support Linux and other platforms that the .NET Framework did not support. Xamarin, the mobile application development framework, was based on Mono.

In 2016, Microsoft introduced .NET Core 1.0. This was a significant milestone as .NET Core supported cross-platform deployments to Windows, Linux, and macOS, as well as other exciting features for developers. From there, Microsoft continued to release several versions of .NET Core such as .NET Core 2.0 and .NET Core 3.0 and their various increments.

Mapping .NET Features and its Ecosystem

At that point, some significant confusion developed in the community over the two .NETs —the .NET Framework and the .NET Core. To resolve that confusion, Microsoft decided in 2019 that there would be just one .NET going forward, which was called .NET 5. Finally, in 2021, Microsoft announced .NET 6, which now supports Windows, Linux, macOS, iOS, Android, tvOS, watchOS, WebAssembly, and more.

To summarize, here is an overview of the three types of .NET, historically:

  • .NET Framework: The original .NET that Microsoft introduced in 2002, which evolved to version 4.0. It supports Windows only.
  • .NET Core: The cross-platform version of .NET that Microsoft introduced in 2016, which evolved to version 3.0. It supports Windows, Linux, and macOS.
  • .NET: The one .NET going forward that can support all the platforms that .NET Core, .NET Framework, and Mono used to support. It started from version 5 and has evolved to version 6.
Unified .NET incorporating .NET Framework &amp; .NET Core

The unified infrastructure of .NET 5 (and onward), which includes elements of .NET Core and .NET Framework (source: Microsoft)

Let’s take a closer look at some of these groundbreaking newer tools and .NET features that developers should know about.

1. Managed Code Platform

In many ordinary programming languages like C and C++, the responsibility for a lot lies with the programmer (i.e., memory management, thread management, exceptions management, garbage collection, security considerations, etc.). That is why these languages are called “unmanaged”—the developer has to manage these low-level activities in unmanaged languages, such as managing pointers, which is a known as a “maintenance challenge.”

On the other hand, .NET-supported languages such as C# and F# are “managed” languages, as the CLR (Common Language Runtime) that runs and executes the code written in these languages takes on the burden of 1) memory management and 2) security considerations from the programmer. Managed languages are powerful since they free up developers from managing low-level activities. You should note that in the unified versions released since .NET 5, CoreCLR takes on the role of the original CLR.

2. The .NET Framework Class Library (FCL)

The .NET Framework also introduced the Framework Class Library (FCL), an expanded set of libraries that increase developers’ productivity. It includes libraries to deal with several external resources and OS-related features such as Windows Forms (desktop technology), ADO.NET/Entity Framework (database technology), encryption, file streams, HTTPS connections, and Web APIs.

The following figure shows examples of features the FCL encapsulates:

Framework Class Library

Image concept courtesy of ZealousWeb

In simple words, the FCL contains a set of ready-made features by Microsoft to make it faster for you to develop applications. In the unified implementation from .NET 5 onward, CoreFX takes on the role of FCL.

3. .NET-Visual Studio Compatibility

Visual Studio is an IDE (Integrated Development Environment) developed by Microsoft. It is a comprehensive development environment where developers can write, test, debug, and deploy their applications. For .NET languages in particular, Visual Studio has robust integration and powerful features.

.NET is highly integrated with Microsoft Visual Studio. Using it, you can create .NET projects that target several platforms such as desktop, web, cloud, mobile, games, IoT, and many others.

Developers who use Microsoft Visual Studio enjoy a set of powerful abilities to do the following:

  • Quickly search, navigate, edit, debug, and refactor source code
  • Debug cross-language in any platform, detect performance issues, and visualize execution history
  • Write and execute unit testing, auto-create unit tests, run live unit tests as you modify your code, and run code coverage analysis
  • Collaborate on code (using source control) and work together in real-time (using Visual Studio Live Share)
  • Deploy applications to emulators, mobile phones, locally, and to different cloud platforms
  • Extend Visual Studio with custom extensions via 3rd party vendors using the Visual Studio Marketplace

Visual Studio also provides code map visualization, static code analysis, and live dependency validation. Read more about them in Microsoft’s docs.

4. .NET’s Runtime Memory Management

One of the key features provided by Microsoft Visual Studio for .NET applications is the ability to analyze the application’s performance from CPU and memory aspects. You can conduct that performance analysis using Performance Profiler.

.NET takes care of memory management using Garbage Collection, which can help you remove and deallocate memory when the variables are out of scope. How about scenarios where you want to understand why your application consumes such large memory?

A powerful tool to perform that analysis is .NET Object Allocation Tracking. Using this tool lets you understand how much memory your application uses and what code paths consume most of your memory.

A typical memory overflow scenario occurs when the memory is fully consumed when a novice developer mistakenly loads the whole database table instead of a single row.

5. Azure Functionality and Performance

Microsoft Azure is a cloud computing service that contains a wide range of solutions such as compute, machine learning, storage, and monitoring services.

Given Microsoft’s foundation behind both, Azure and .NET play very nicely together. Suppose your application uses Microsoft Azure as a hosting service. In that case, you’ll have access to a wide range of SDKs in the NuGet package manager that enable you to seamlessly manage and operate cloud resources.

For example, if your application requires a storage service to store images, you can easily create a storage account in Microsoft Azure and then include the “Azure.Storage.Blobs” NuGet package in your project, configure a few parameters, and then have access to cloud storage in your application. Here is an example source code.

6. Flexible Deployments with .NET

Another benefit introduced with .NET Core (and followed in .NET 5 and later) is the side-by-side installation, which allows you to straightforwardly deploy several applications. Each application runs with different versions of .NET on the same computer without making the applications break each other.

This setup has led to more convenience and flexibility in application deployment that was not possible in the .NET Framework since the .NET Framework is a Windows component that has to be replaced with each new version.

7. .NET Standard

This feature goes without saying since the unification of .NET’s core platforms, but we should note it anyway. .NET Standard is an API specification that declares a specific set of APIs that all .NET platforms must implement.

For example, .NET Standard 2.0 is implemented by .NET Framework 4.6.1, .NET Core 2.0, and Xamarin.iOS 10.14. Therefore, instead of writing three applications that target three platforms, you can simply write a code that targets .NET Standard 2.0. That code will make it possible for all three platforms to use the same code.

However, starting from .NET 5, all future versions of .NET will support .NET Standard 2.1 out of the box. Therefore, after .NET 5, the .NET standard has become less relevant.

Gaining Visibility into .NET

In this tutorial, you learned about the .NET Framework history and how it evolved to .NET Core and eventually to .NET as it started to target more frameworks and gain more features.

After that, you learned about some revolutionary features the .NET Framework introduced. The managed code platform runs on the CLR to handle crucial aspects on behalf of the developer, and the framework class library (FCL) increased developers’ productivity by encapsulating common functionalities such as Web APIs and database access.

Other critical .NET features include its high compatibility with Visual Studio, memory management, easy integration with Azure cloud, flexible deployments, and finally, the .NET Standard that made it easier to write one code base for multiple platforms.

As you develop .NET applications and deploy them to production, you’ll need to have visibility and understand what is going on to detect bugs and issues. Be sure to check out Rookout, a tool designed to debug distributed cloud architecture, making it easier to manage and debug live .NET applications with instant code-level observability.

Python ∙ Java ∙ Go ∙ .NET ∙ Ruby ∙ Node.js & MORE. Rookout covers it all.

Try Rookout for free!

Synced. Safe. Secure. Rookout debugs without direct access to your source code

Try Rookout for free!

Rookout Sandbox

No registration needed

Play Now

Table of Contents
Get the latest news

Why Python 2.7 Will Never Die

Keanen Koppenhaver | Guest Author

7 minutes

Table of Contents

Python is a programming language originally developed in the late 1980s. Since then, it has seen continuous growth and remains one of the most popular programming languages, especially in data science. Many programmers learn Python as their first language, and it has a wide range of uses. Its second iteration, Python 2.0, landed in 2000, after extensive development throughout the 90s. This version included many features that modern Python developers take for granted, including better memory management and a software development process more closely aligned with other open-source projects.

Python 3 was released in 2008. However, it has not proven as successful as its older sibling. Community adoption has been much slower due to the many backwards-incompatible changes between Python 3 and Python 2.7.

Even today, some thirteen years later, many production workloads are still running Python 2.7. As just one example, the statement print 'Hello World' is valid code in Python 2.7 but will throw an error in Python 3 unless modified to print('Hello World'). One can imagine the effort involved in making many such changes across a large codebase.

In this article, we’ll look at some of the reasons why Python 3 has struggled to achieve widespread adoption and why Python 2.7 will likely be around in some form for a very long time.

Python 2.7 Forks

As the migration from Python 2.7 to Python 3 started to go less and less smoothly, and it became clear that Python 2.7 was going to be around for some time, forks of the main language started to appear.

Tauthon

One such fork, Tauthon, is a “backwards-compatible fork of the Python 2.7.18 interpreter with new syntax, builtins, and libraries backported from Python 3.x.” It includes some incredible features. For instance, you can take advantage of async/await syntax (as shown in this example from Tauthon’s repo):

>>> import types
>>> @types.coroutine
... def delayed_print():
...     printme = yield
...     print printme
...
>>> async def main():
...     while True:
...         await delayed_print()
...
>>> coro = main()
>>> coro.send(None)
>>> coro.send("hello")
hello
>>> coro.send("there")
there
>>> coro.send("friend")
friend

Developers using Tauthon get all the cool add-ons of Python 3 without having to give up on interpreters of or upgrade from Python 2.7. As a fork of the original language, support for it continues, whereas maintenance of the original v2.7 was discontinued in 2020. Because the Tauthon project is maintained and supported, Tauthon users don’t have to worry about their production workloads relying on an unsupported underlying language.

PyPy

In addition, PyPy is a project that, because of its inherent architecture, has publicly committed to support Python 2 as long as they are around. So, there are multiple options for anyone looking to continue running a version of Python 2.7.

Code Incompatibility between Python 2 & 3

To say that switching from Python 2 to Python 3 “isn’t a priority” would be incorrect. In fact, many, if not most, teams see it as a liability.
Firstly, upgrading from Python 2.7 to Python 3 would likely cause extended downtime or considerably delay implementing new features.

Due to Python 3’s backwards-incompatible changes, there are many code incompatibilities across codebases that traditionally run Python 2.7. Moving to Python 3 would require an audit and rewrite on a scale beyond the ability or desire of many teams, such as those on small open-source projects, long-running academic experiments, or even commercial projects that don’t get much attention.

Given the extent of work required, finding and fixing all of a project’s code incompatibilities and bringing it to a level that’s compatible with the Python 3 interpreter is often put in the backlog. In fact, it might never even be considered at all, especially for projects with limited funding or that are run as side projects.

Attempts have been made to automate this process through various Python packages. However, in most cases, automated code fixes such as those performed by this package should be manually reviewed, especially if the codebase in question doesn’t have solid automated test coverage.

Library Support for Python 2.7

Most Python projects pull in at least one third-party library. To upgrade a codebase to Python 3, all of the libraries that the codebase uses have to be compatible with Python 3 as well. However, those libraries suffer from the same limits that prevent first-party projects from upgrading to Python 3, so many of them still won’t have a version that supports Python 3.

When auditing your application for a potential Python 3 upgrade, it’s important to investigate the libraries it uses for compatibility with Python 3. If one or more isn’t, then it can make any upgrade discussion of your first-party code irrelevant, as that library will hold you back until there is a Python 3 compatible version. There are a wide variety of libraries that haven’t upgraded to Python 3 for one reason or another. It’s important to check if there is Python 3 support for all of your libraries before taking this upgrade process on yourself.

Automated Fixers

As previously mentioned, automated fixers can make Python 2.7 codebases compatible with Python 3. They work relatively well if you don’t want to wait on a Python 3 port, especially with smaller-scale libraries.

However, it’s worth restating that these automated fixers are not 100% reliable and should always be accompanied by 1) frequent manual testing and 2) a strong set of automated tests. This will check that there are no regressions or other breakages due to the fixer missing specific incompatibilities or some other quirk in the codebase.

Large-Scale, Mission-Critical Projects

On the flip side of the projects mentioned earlier that are either too small or don’t get enough attention to warrant a full-scale migration to Python 3, there are large, mission-critical projects that cannot afford any downtime or any potential hiccups that might come from a Python 2-to-3 migration. Take COBOL, for instance. Many production-grade projects still run COBOL, a decades-old language with many arguably better modern alternatives. These applications continue to run this outdated language because they deal with large amounts of money or are mission-critical in other ways and can simply not tolerate the uncertainty that a major re-platforming would entail.

The platforms that currently run these projects are a known quantity and, in many cases, have been running for years. In much of the same way, migrating to Python 3 might introduce new bugs or even regressions that other developers previously fixed. In addition, many of these legacy or larger-scale projects don’t have adequate test coverage for teams to be confident about such a migration.

For these reasons, these sorts of projects still using 2.7 are likely to continue using it … as long as there is reasonable support for the platform, of course. As mentioned, even though Python 2.7 is no longer officially supported, there are ways to continue running older Python infrastructure without the risk of running an unsupported version of the Python interpreter.

Wrapping Up

For all the reasons highlighted in this article, Python 2.7 (or some evolution of it) is likely here to stay for the foreseeable future. As mentioned, it is difficult to find suitable tools and infrastructure that continue to support Python 2.7 even as the migration to Python 3 continues.

Rookout is a tool for debugging distributed cloud systems and is committed to supporting Python 2.7 as long as customers need it. It’s a practical solution if you’re looking to debug your current systems or even if you’re considering transitioning your current codebase to Python 3 and want to make sure you don’t introduce any new bugs.

Whether you’re looking to migrate from Python 2 to Python 3, or wondering why a codebase you recently inherited is still on Python 2.7, or somewhere in between, hopefully, you now understand the reasons why Python 2.7 will likely be around for a long time, as well as some of the upgrade challenges that are in place and some ways these challenges can be handled.

Rookout Sandbox

No registration needed

Play Now

Table of Contents
Get the latest news

Why is Java Making a Comeback?

Karl Hughes | Guest Author

10 minutes

Table of Contents

Java, the programming language powering over 3 billion devices, celebrated its 25th anniversary in 2020. Despite its age, this language is far from dead.

As Brian Goetz, Java Language Architect at Oracle, has said, “If I had $1 for every time Java was declared dead, I could probably retire!”

Yes, it’s easy to find someone who is bashing Java, often on social media and for no reason. Recently, for example, people blamed Java for a vulnerability related to Log4j. Many young developers consider Java to be old school compared to other JVM languages like Scala or Kotlin. However, the recent language rankings released by RedMonk, a developer-focused industry analyst firm, indicate otherwise: Java was tied for second place with Python. In their words:

The language once created to run cable set top boxes continues to be a workhorse, and importantly one that has consistently been able to find new work to do. Java’s performance on these rankings continues to impress, all these years later, and as it’s shown a remarkable ability to adapt to a rapidly changing landscape, it’s a language that would be difficult to bet against.

Over the years, Java has become more robust and continues to evolve fast. This article discusses the features of Java that suit modern development and why it is starting to gain steam again.

Modern Use Cases Java is Well-Suited For

Java remains so widely used because it continues to work well for even modern use cases. Here are a few:

1. Distributed Environments

Java is a natural choice for tools developed to handle massive data in a distributed environment because, among other things, it features:

  1. Automatic Garbage Collection
  2. Core Networking APIs
  3. Multithreading
  4. Rich Data Structures
  5. Security (e.g., code compiled to bytecode and run inside JVM)
  6. Robustness, eg, strong type checking

Distributed systems typically need to deliver high throughput. It is challenging to achieve it without using multithreading in the core API. Java supports threading, locks, and multithreaded data structures from its initial releases. In the recent Java version(JDK 17), developers added more advanced capabilities to the core Java API. Because of these features, Elasticsearch, the most popular distributed search engines, core API Lucene, and many other popular IMDG are written in Java.

Doug Cutting, who chose Java when he created the Apache Hadoop framework, explained his choice like this:

Java offers a good compromise between developer productivity and runtime performance. Developers benefit from a simple, powerful, type-safe language with a wide range of high-quality libraries. Performance is generally good enough. When it falls short, native code has been used to keep overall performance in line with C and C++.

Debugging distributed, multithreaded applications is not an easy task. If you face such challenges, you can leverage live Java debugging tools like Rookout. Rookout to place non-breaking breakpoints in your Java application and get logs, traces and metrics needed to fix bugs…

2. Game Development

Several popular games, including the bestseller Minecraft, run on Java.

In Java, some excellent libraries and game engines are explicitly used for game development, both mobile and PC:

  1. lwjgl
  2. libgdx
  3. jmonkeyengine
  4. slick2d

As a developer, it’s easier to get up to speed using these libraries as you don’t have to start from scratch.

While you won’t find an AAA category game purely written in Java because modern consoles don’t support Java games, Java is well-suited for indie or mobile games.

3. Desktop Applications

Since its inception, Java has supported desktop application development using its toolkit Swing. Recently, AWT and Swing moved to the jdk.desktop module, and they are not shipped as part of JDK, but you can still use it separately.

JavaFX is another open source alternative worth considering for desktop application development.

4. Web Applications

Java is generally preferred for backend development. However, that doesn’t mean you can’t use it to create feature-rich web applications.

Java developers can use technologies like servlet, JavaServer Pages, and JavaServer Faces, which all form part of the Java EE platform, for webdev. Other Java frameworks like Spring and Vaadin provide support for quickly building web applications with great UX.

5. Cloud Applications

As the great application workload migration to the cloud continues, cloud-native apps have become the new norm.

Traditionally, Java applications are developed to run in Java virtual machines (JVM). It means that strong servers are needed to host complex applications. But when adopting a cloud-native approach with Java, these monolithic applications get replaced by microservices that require much less computing. Because of the elasticity of cloud computing, this approach also allows organizations to easily scale applications up or down as the need arises.

Moreover, performance improvements in the recent Java releases and tools like GraalVM have gone a long way to solve Java’s cold start issue that made some folks prefer languages like Node.js as the backend for their function-as-a-service (FaaS) use cases.

Kubernetes-native frameworks like Quarkus are also trying their best to make Java a leading platform in serverless and containerized environments.

Features That Contribute to Java’s Enduring Success

Java has been so enduring because of certain features. Here are the main ones.

Platform Independence

Java is platform-independent, which means the byte code generated can be run on all operating systems. WORA (write once, run anywhere) sets Java apart from other languages due to its ability to run across platforms. Internally, the JVM, i.e., a virtual machine that executes Java class files, is primarily responsible for ensuring that a Java program runs the same on any device or operating system.

Strong Multithreading Support

With modern multicore machines, it makes sense to use a language that best utilizes hardware resources. Java handles it perfectly by allowing you to execute multiple threads for better performance.

Multithreading is not new to Java. It was part of its initial releases, and it has set Java apart from other languages since the start. Threading API has evolved by introducing higher-level abstractions like Executor and the ForkJoin Pool framework.

With Project Loom, Java introduced the concept of virtual threads, which makes Java an even better option for writing high performance systems, as illustrated by the code samples below.

In the first code snippet below, we create threads using the traditional approach by extending the Thread class and passing some runnable tasks to its constructor. In this approach, the thread created is tied to the OS.

Thread t = new Thread(new SomeRunnableTask()); t.start();


In the following code snippet, we create threads using the startVirtualThread method of the new Loom API and pass some runnable tasks. Here the lightweight thread is created by the JVM, not the OS. It’s lightweight because JVM manages it and doesn’t suffer from context switching, which is usually an issue with traditional threads.

Thread.startVirtualThread(new SomeRunnableTask());

Suited for Distributed Environments

Many popular data processing frameworks that can handle massive parallel computations are written using JVM languages like Scala or Java. The engineers who created these frameworks know that Java is inherently optimized and can handle the parallel processing of massive data.

Suited for Embedded Systems

Java is widely used among embedded systems such as ATMs, printers, and POS systems.

Java’s cross-platform portability reduces development costs for embedded systems by easily porting code to a new architecture, compared to other languages like C that are traditionally used for embedded systems. Moreover, as opposed to the past, you no longer require large memory to use Java for embedded systems.

Strong Big Data Tooling

Data is the new oil, and traditional database management tools may not be capable of storing data that increases over time exponentially.

Java is the backend language that’s been used to develop the most popular big data tools. Apache Hadoop, the most popular big data management tool, is written completely in Java.

Many popular big data tools, such as Apache Spark, Apache Storm, and Apache Kafka, provide Java APIs.

Historical Reasons, Strong Documentation, Broad Support

Java was initially developed as a general-purpose language that can run on various platforms like mobile or desktop. As already mentioned, even back then it was written on the “write once, run everywhere” (WORA) principle to promote Java’s cross-platform abilities, one of its strongest features.

Even though Java was released by Sun Microsystems (acquired by Oracle in 2009), most of its parts are under open source licenses with OpenJDK. Quite a few builds of the OpenJDK have been offered by different vendors such as RedHat, Amazon, and SAP. Recently, Microsoft also started offering OpenJDK build.

Java has robust documentation and excellent community support. Oracle recently announced a new learning platform, dev.java, that contains all their Java learning resources.

With Java’s six-month release cadence, developers can leverage new features much faster, and enterprises that don’t want to update quickly can use the long-term support release every two years.

Static Typing

Java is a statically typed language, which means that while declaring variables, you have to specify data types. Even though Java 10 introduced the var keyword, which gives you a feel of dynamic typing, its scope is limited, and Java is still statically typed.

The benefit of statically typed language is that it gives you some safety net from runtime errors compared to a dynamically typed language like Python. The language itself can’t stop you from writing terrible code, but it can prevent a lot of it at compile time.

Another benefit is the default performance optimization that you get with statically typed language like Java, since there isn’t runtime checking as compared to Python. Of course, measuring performance depends on many factors, so a debate about whether Java or Python is fastest is futile. This benchmark provides an interesting comparison between Python3 and Java, though.

Support for Functional Programming

Java 8 first introduced us to functional programming via functional interfaces and lambda expressions features. Even though Java is an object-oriented programming language and developers do coding using OOP concepts such as encapsulation, inheritance, polymorphism, and abstraction, adding the functional programming construct was welcomed by the Java community.

Even though lambda expressions implement functional interfaces, they technically are objects and not functions. But you can mimic functional programming using lambda expressions and treat functions as first-class citizens as per the functional programming concepts.

Backward Compatibility

Java’s backward compatibility allows you to run code compiled in an older version of Java to a newer version. It includes both binary and source code compatibility. It also means that you can always upgrade to more recent and improved Java versions without worrying about whether your code will work or not.

It is a massive relief for enterprises as they don’t have to spend time and energy testing applications with different versions.

Conclusion

Suited for many use cases and robust features, the future of Java is bright. It’s further strengthened by a worldwide community investing in its continued development and growth.

Among Java’s strongest appeals are its platform independence, backward compatibility, and state-of-the-art Java virtual machine feature. Even though these features have made it popular among enterprises, they can impede Java’s growth compared to other languages. For example, backward compatibility has some disadvantages, such as slowing the pace of adding newer features to the language. It also results in some old deprecated classes and methods, which may never get deleted, hence cluttering up the Java API with each new version.

So even though it may not suit all your needs, it works well to help enterprises get things done efficiently.

If you’re considering using Java for your cloud-based applications, have a look at Rookout. It is a tool that lets you debug your distributed cloud-based Java applications while providing a familiar IDE. You get code-level observability with full logging of your data while still running your application live in production. To see how this works, head over to their sandbox and try it out for yourself.

Rookout Sandbox

No registration needed

Play Now

Table of Contents
Get the latest news

Level Up Your Serverless Debug Experience

Oded Keret | VP of Product

5 minutes

Table of Contents

The concept of someone else being responsible for your code is a huge relief. As a developer, having someone else handle the burden of managing the entire infrastructure that runs my code gives me more time to deal with the actual development.

Serverless debug technology benefits more than just the sole developer. It reduces cost by automatically adjusting resource allocation, abstracts both network and server management, saves complexity, and improves the overall application performance.

For these reasons and more, serverless technology has taken off in recent years, and its usage is still growing strong.

Overcoming New Challenges

Unfortunately, the adoption of serverless debug technology is not taking off as quickly as it should, according to research by the Cloud Native Computing Foundation (CNCF) in their report The State of Cloud Native Development. This is in large part due to the difficulty of understanding and troubleshooting problems within AWS Lambda functions, which are extremely abstract and highly ephemeral. The median Lambda invocation is less than 60 milliseconds and can happen tens of thousands – or even hundreds of thousands – of times throughout a day at scale.

Abstraction brings the benefit of not having to worry about infrastructure. But it also means you can’t see the servers and don’t always know what’s going on. You need to adopt new tools and methods; you need to adapt to a new way of thinking about how your application is behaving. You have to anticipate more things in advance, incorporating that foreknowledge (which might be sophisticated educational guessing) into your Lambda functions ahead of time.

When used incorrectly, serverless technology could incur unwanted costs. Writing inefficient code could make your serverless functions run too long, costing more money instead of saving it. Misconfiguring memory limitations on your Lambdas could make your functions fail (when not enough memory is allocated), or cost too much (when too much memory is allocated).

Embracing New Debugging Methods

To overcome the emerging challenges of debugging serverless functions, it is necessary to adopt the right tools. Classic debugging methods – such as breakpoints, adding log lines, or SSH-ing into a remote server – are just not relevant anymore when it comes to serverless functions.

What’s more, debugging either Kubernetes or non-serverless cloud deployments focuses on what is currently running. Serverless functions operate too quickly for current debugging data to be relevant. Those functions operate on a ‘SPIN-RUN-TEAR’ protocol: Spin up when you’re triggered → Run your logic → Tear yourself down immediately. 

The single-purpose code sections used in serverless implementations run and stop dynamically according to that particular application’s needs. This is event-driven architecture. Its very nature makes it harder to trace – and consequently understand – what is happening in each and every function.

The fact that each function is limited to run for only a very short period of time makes it even harder to use a traditional debugging tactic like viewing relevant data via breakpoints.

Additionally, reproducing an issue locally is a challenge in the most popular serverless frameworks, as deployment and execution flows are quite different from live executions. Serverless functions are distributed and hosted in the cloud by their very nature, which makes it very difficult and sometimes even impossible to reproduce an environment and that is presenting teams with a big challenge to handle when troubleshooting and debugging your application.

Getting By with Just a Little Help

Our job here at Rookout is to help developers adapt to development and troubleshooting in new and emerging technologies. Seeing the limitations of debugging in the cloud, we wanted to make serverless applications more accessible to more familiar debugging techniques. 

We see the everyday challenges evolve rapidly as technology and methods keep changing. We’ve been working with customers on transitioning to serverless architectures for a while now, and we’ve seen the special kind of pain debugging a serverless deployment is. With that experience, we’ve been working on attacking those pain points, and our first effort is around adding new visualizations.

The graphic below charts the upcoming debug session, in a way that is particularly helpful for serverless environments. Instead of showing boxes representing servers or containers, we wanted to show a timeline view that tracks when users invoke different functions and in which environments.

The Rookout Serverless Debug Experience

The Rookout Serverless Debug Experience

A Fuller Story

Our motivation was to tell a fuller story of a function’s behavior, allowing developers to identify which problematic functions are invoked too frequently or too little at the time of a production incident. This is the sort of issue that can be compounded when dealing with serverless work. Serverless deployment is all about being hands-off as much as possible, so you expect to save time with such a serverless deployment (and, consequently, troubleshooting them).

If you need to scale resources, your functions will do that automatically. But a bug can throw off those functions, missing points when you need to scale or scaling when you don’t have to, leading either to a loss of revenue or paying too much for your serverless deployments.

Upon initial release of our new debugging capabilities, responses have been overwhelmingly positive. Our customers, who so far were completely unable to debug their serverless environments, now find that it’s almost as straightforward as debugging locally. It’s still not that walk in the park we wanted it to be, but we’re getting there.

For some of our customers, just the fact that we show them what their running environment looks like is miles ahead towards understanding where the problems could be. For others, the full power of Rookout is unleashed upon their code, making it possible for them to fetch full debug snapshots, log lines, and metrics with the click of a button.

Conclusion

The new Serverless Debug Session visualization provides comprehensive coverage to a variety of serverless frameworks, and allows robust scale of thousands of function invocations every day. The new serverless experience provides a coherent workflow. It facilitates Dev and DevOps teams’ response to an alert within their traditional monitoring or observability solution, then drills into the problem at the code level, getting instant insight into areas where they need to focus their investigation efforts.


Rookout Sandbox

No registration needed

Play Now

Table of Contents
Get the latest news

Comparing Frameworks for Node.js Serverless Apps

Gedalyah Reback | Senior Product Marketing Manager

10 minutes

Table of Contents

Cloud deployments have gotten more complicated over the years. That’s on them, but it’s not necessarily to a fault – there’s just so much more you can do now than in the past. That blossoming in capabilities really owes itself to each new service getting easier over time. AWS, Google, and Azure started offering to relieve the burden of on-premises computing infrastructure. Very quickly, users and providers were overwhelmed by demand and the proliferation of new cloud services. 

AWS launched in 2002, then started offering to replace on-premises infrastructure with its own. After Google and Microsoft launched their own offerings, Docker debuted in 2013 to organize (“containerize”) the multiplying number of services developers were starting to use. Kubernetes arrived soon after, and since then there has been a plethora of tools to try to make sense of Kubernetes itself. Obviously, this will be confusing for a novice, but it suffices to say for both the newly cloud-initiated and veterans that this is a lot of infrastructure to organize.

We’ve now arrived at the era of the poorly named “Serverless” architecture. In the same way that “in the cloud” doesn’t really mean a file now exists in the ether, “serverless” apps aren’t actually separated from servers. Serverless implies that developers don’t have to manage servers themselves (brass tacks: “serverless” apps are still on servers).

To clarify, these are Node.js frameworks for serverless applications. These are not Rest API frameworks, MVC frameworks, nor full-stack MVC frameworks. There are some great Node.js framework comparisons you can look at for more info. 

1. AWS SAM (Serverless Application Model)

AWS SAM

Yes, AWS SAM has a squirrel as a mascot. Be warned, searching “Amazon SAM squirrel” returns A LOT of kids books about Sam-named squirrels

AWS has its own serverless framework called SAM. It’s open-source, with SAM and the SAM CLI both released under an Apache 2 license. The use of the SAM CLI to deploy an app is optional, or you can work through a third party-based pipeline. 

SAM has you model an app with YAML, but SAM also has its own syntax for functions and APIs. That syntax, which also deals with mapping and databases, is meant to be extremely simple. SAM is – as you might have guessed – pretty integrated with the rest of the AWS ecosystem, so it automatically takes an essentially shorthand syntax and expands it out to match CloudFormation syntax.

However, SAM’s main strength is also its main drawback – it is part, parcel and inseparable from AWS. On the one hand, there’s nearly a tool for every need: Use Cloud9 IDE for debugging, Lambda for serverless functions, CloudFormation for traditional monitoring, CodeDeploy for code…erm…deployment, etc.

AWS SAM architecture example (Diagram from AWS)

AWS SAM architecture example (Diagram from AWS)

Additionally, SAM is newer relative to some of the other open-source options. That newness is probably, at least partially, responsible for the smaller community of plugin creators relative to some other solutions. 

Prereqs to installation include both an AWS account (plus IAM permissions and AWS credentials) and Docker. 

Update the installed packages and package cache on your instance.

  1. Update packages:
sudo yum update -y
  1. Install Docker.
sudo amazon-linux-extras install docker
  1. Start Docker.
sudo service docker start
  1. Add your ec2-user to the new Docker group (this way you can drop the sudo before each command):
sudo usermod -a -G docker ec2-user
  1. Log out and log back in to activate the new Docker permissions. Just close your terminal window, then open a new one and reconnect to the instance where you just installed Docker.
  2. Finally, install AWS SAM CLI

For ARM: 

If you’re using ARM architecture, the installation is really easy:

pip install aws-sam-cli

For x86:

Download aws-sam-cli-linux-x86_64.zip. Then unzip it:

unzip aws-sam-cli-linux-x86_64.zip -d sam-installation

And install:

sudo ./sam-installation/install

2. Architect

Architect (ARC) logo

Architect (which you can also refer to as arc.codes, its URL, to avoid confusion when searching for info on the project) is another open-source framework, a part of the OpenJS Foundation with an Apache 2 license. It focuses exclusively on AWS. You can check out its GitHub repository for more details. Its maintainers call it an IaC framework (infrastructure-as-code) “at its heart.” 

There is support for some other languages in terms of function runtime: Python, Ruby, .NET, Java, and Golang.

This is where Architect’s focus on AWS becomes obvious. Despite it working as an independent framework from SAM, it still works through it in order to deploy an application. Architect takes application code in the form of an app.arc file, then compiles it into an AWS SAM app, preparing to ultimately deploy it in AWS CloudFormation. So while the bulk of your work is done within Architect, deployment means sending it through the very same conduit of tools that you would have had otherwise, had you just started building the app on AWS SAM in the first place.

But that is also an outgrowth of Architect’s original full focus on AWS, which it has tried to move away from at least slightly. It was once dependent on AWS API Gateway, it later moved to HTTP APIs. It also has its own configuration language – arc – that is easy to learn.

Its local development workflow lets you open an arc sandbox from Terminal. You can even test and debug the code offline.

Architect, Getting Started Quickly

It’s fairly simple to start a new project. Install a version of Node.js 14+. Then, open Terminal:

npm i -g @architect/architect

Create a new directory and a new app within it:

mkdir testapp
cd testapp
arc init

Start a local dev environment:

arc sandbox

Deploy to staging in AWS:

arc deploy

Finally, deploy it to production in AWS:

arc deploy --production

3. Claudia.js

Claudia.js logo

Claudia is similar but has a little more going for it right now. It too is an open-source Javascript-based framework, but has about triple the activity and contributors on GitHub. Rather than a full-fledged framework, Claudia.js aims to be “an open-source deployment tool” or “deployment utility” according to its docs.

It’s also limited to AWS, but in this case API Gateway in addition to AWS Lambda. To that effect, it includes an API Builder which Claudia’s maintainers argue is “minimal and standalone.” It includes extension libraries both for API building and chatbot development.

It also has very simple commands. They also boast of being able to use NPM packages to build and deploy APIs without having to bother with an extra tool like Swagger. Some common configurations, like error routing or CORS support, are set by default in Claudia.

It has numerous extension libraries for different APIs, a straightforward versioning tool, and is extremely easy to learn (anyone with decent Javascript experience should get a quick grip on this one).

Claudia.js, Getting Started Quickly

Claudia.js is pretty straightforward when it comes to installation. Prerequisites include NPM, Node.js, and an AWS account with IAM and Lambda access. Install it using NPM and then create a designated AWS profile to connect it. 

  1. FIRST, install locally. We’ll give you the fastest installation breakdown here, as a global entity (the easiest route according to Claudia’s docs):
npm install claudia -g

(You can also install it as a dependency, but even the dependency Claudia installation process is fairly simple)

  1. NEXT, on AWS, create a profile with full access and/or admin privileges to 1) IAM, 2) Lambda and 3) API Gateway. 
  2. THEN, set the AWS_PROFILE variable to whatever name you want (let’s call ours jeanCLAUDIAvanDAMN). Save the key set (presumably where you usually save your AWS keys):
[jeanCLAUDIAvanDAMN]
aws_access_key_id = YOUR_ACCESS_KEY
aws_secret_access_key = YOUR_ACCESS_SECRET

If you want to use a separate profile to access Claudia.js, you can create multiple thanks to the AWS Node.js API. Default access will go to the one you used for Step 3, but you can always add more:

AWS_PROFILE=profileNumberTWO claudia <options>

4. “Serverless Framework”©

Serverless Framework logo

I saved this one for last for an important reason: its name is confusing. It is definitely the most popular option for a framework to build and deploy serverless apps. But because of its name, searching for information about any (lowercase) serverless framework will inevitably lead you to info about the (uppercase) Serverless Framework©. (You could also stylize it “Serverless ⚡” to fit with its old logo).

There is way more to this framework though than just its marketing-friendly name. It has an extremely wide range of options. It works with all three major cloud services and supports more than 10 different languages. It also has a long list of plugins. And yes, it’s also open-source.

Again, it can handle multi-cloud deployment. That means you can use AWS Lambda with Amazon Cloud, Azure Functions with Azure’s cloud services, and Google Functions with GCP (Google Cloud Platform). 

But it goes further than all that. It offers real-time logging and metrics, dipping into some of the services you might expect from observability service providers. Its AWS monitoring will automatically include, for instance, Lambda logs, AWS spans, and finally HTTP spans. You can also turn off all those default settings in serverless.yml:

custom:
  enterprise:
    disableHttpSpans: true
    disableAwsSpans: true
    collectLambdaLogs: false

In contrast to a framework choice like AWS SAM, Serverless Framework has a large plugin contributing community. On the flip side of that, it has a lot of lower quality plugins. And being independent of a gigantic cloud ecosystem, it is dependent on third party tools for monitoring. That can make things more time-consuming, even if you would prefer to have those third party tools in your stack.

Even with those negatives taken into account, it is a lot more flexible than other tools. It is quicker to deploy serverless apps, provides detailed information about software updates *while updating*, and much simpler CLI arguments.

To install, make sure you have all the prerequisites, then simply download with NPM:

npm install -g serverless

Comparing Serverless Options for Node.js Frameworks:

This is clearly just an introductory comparison to the major frameworks available for serverless applications in Node.js. There are several other considerations to factor into making a decision on where to build most or all of your Node apps in a serverless architecture. Here is a chart comparing some of the main points. (Assume that prerequisites include at least Node.js 14+, NPM and a relevant cloud provider account with full permissions.)

Statistics in this chart are as of 30 March 2022. We will update these periodically.

AWS SAM Claudia.js Architect “Serverless Framework” ©
Version as of this writing 1.44.0 (29 March 2022); Release Notes 5.14.1 (17 March 2022);
Release Notes
10.0.5 (Taniwha);
Release Notes
3.9.0 (24 March 2022);
Release Notes
Github stars 8,500+ 3,700+ 2,000+ 42,400+
Forks 2,200+ 279 89 5,200+
Contributors 225 38 32 935
Clouds AWS only AWS only AWS only AWS, Azure, GCP
Languages beyond Node.js? Yes – Python, Ruby, Go, Java, .NET; (debugging only for Python, Go, & Java) No Yes – support for Python, Ruby, Go, Java, Deno, .NET (& C#) Yes – Python, Ruby, Go, Java, C#, F#, Scala, Swift, PHP, Kotlin

That scalability and background processing fills in some of the few disadvantages of Node.js. Complementing an already event-driven runtime like Node.js with serverless architecture creates a potent base for a serverless application stack.No matter the language you choose, serverless applications are a step above what came before them. They have faster deployment cycles, simultaneous scaling while abstracting cloud infrastructure, and a lot of maintenance is handled outside your own organization.

Be that as it may, current standards of serverless debugging leave a lot to be desired. Debugging by individual lines is either limited or unavailable, and overly complex logging is the only alternative a lot of developers see to remedy that shortcoming. On top of that, you face the same challenges more commonplace with microservices: multiple configurations, multiple sets of permissions, and more chances to make an error in setting those up.

Let us know if you would like to see more information in a deeper comparison among these four or other serverless framework options for Node.js applications.

Rookout Sandbox

No registration needed

Play Now

Table of Contents
Get the latest news

Java Remote Debugging with IntelliJ

Reshma Sathe

8 minutes

Table of Contents

Java is one of the most widely used programming languages because of its principle of “compile once, run anywhere.” Its many syntax constraints, though, mean that writing code in a basic text editor can become tedious. You can use an integrated development environment (IDE) like IntelliJ IDEA to improve your output, with features like compile-time error suggestions and intelligent code completion. One of the most helpful functions of IntelliJ is its debugging capacity.

IntelliJ offers multiple features to make Java debugging easier. You can use out-of-the-box or custom configurations, run multiple debugging sessions at once, and fix and reload problematic code while your session is running. As more organizations move their software development to the cloud, though, remote debugging has become increasingly necessary.

In this article, you will learn how to configure a Spring Boot application for remote debugging with IntelliJ.

About Remote Debugging

While traditional debugging works with software hosted on an on-premise system, remote debugging enables you to debug cloud-hosted code by setting up a connection between your local environment and the remote server.

To debug remote Java applications, the Java Debug Wire protocol (JDWP) is used. This protocol defines the format of the communication between the JVM and the debugger. JDWP, however, is only one piece of the puzzle. The JVM and the debugger both implement other specifications that complete the big picture. The JVM implements JVM Tool Interface (JVMTI), which is a low-level specification that provides the debugging abilities to the JVM, for example, the ability to inspect the current object, and to set breakpoints. The debugger on the other hand, implements the Java Debug Interface (JDI). JDI is a pure Java interface that provides a high level way to pass debugging requests from the debugger to the JVM using JDWP.

When connecting a debugger to a remote JVM, either the debugger or the JVM can act as the server and the other can attach to it. In this article, the JVM will act as the server and the debugger will connect to it.

Why Do You Need Remote Debugging?

An increasing number of applications use microservices-based architecture, meaning pieces of the codebase run on different servers but work as a single application in production. Since the application does not have access to the resources required for debugging, remote debugging is a good solution.

Another reason to use remote debugging is that you can’t run Java applications in debug mode inside of a production environment, since it’s disabled by default and you can’t switch it on. In order to debug such an app, you would have to do reproduce a list of specific conditions. That means 1) the environment, 2) the individual steps, and 3) the issue itself, all either in your local environment or on dev servers. In this situation, remote debugging would come in handy, but that by no means implies remote debugging is the ideal tactic. As this tutorial will demonstrate, there are some drawbacks to remote debugging that may and sometimes may not be overcome

Setting Up Remote Debugging for a Spring Boot Application

In this tutorial, you’re going to set up and run a remote debug configuration for a Spring Boot REST application. While this example is written in Java, remote debugging can be performed on applications written in almost any language or framework.

To see the full code for the application, visit the GitHub repository.

Prerequisites

  • IntelliJ IDEA Community Edition (this article uses version 2021.3.2)
  • Java 9+
  • Any Java project. This article uses a Spring Boot Maven application with Spring Boot Tools just to demonstrate the process, but any Java project would work.

Step 1: Create a Project

To create a Spring Boot project, head to Spring Initializr and set up a project. Save the project and open it with IntelliJ.

Spring Initializr

Step 2: Create Host App Configuration

In order to debug the Spring Boot app, first add one endpoint so that it can be run and tested.

In IntelliJ, open remotedebuggingapplication.java file from the following location:

src/main/java/com/example/remotedebugging/RemotedebuggingApplication.java

Next, add the following code:

<span class="hljs-keyword">package</span> com.example.remotedebugging;

<span class="hljs-keyword">import</span> org.springframework.boot.SpringApplication;
<span class="hljs-keyword">import</span> org.springframework.boot.autoconfigure.SpringBootApplication;
<span class="hljs-keyword">import</span> org.springframework.web.bind.annotation.GetMapping;
<span class="hljs-keyword">import</span> org.springframework.web.bind.annotation.RequestParam;
<span class="hljs-keyword">import</span> org.springframework.web.bind.annotation.RestController;

<span class="hljs-annotation">@SpringBootApplication</span>
<span class="hljs-annotation">@RestController</span>
<span class="hljs-keyword">public</span> <span class="hljs-class"><span class="hljs-keyword">class</span> <span class="hljs-title">RemotedebuggingApplication</span> </span>{

    <span class="hljs-function"><span class="hljs-keyword">public</span> <span class="hljs-keyword">static</span> <span class="hljs-keyword">void</span> <span class="hljs-title">main</span><span class="hljs-params">(String[] args)</span> </span>{
        SpringApplication.run(RemotedebuggingApplication.class, args);
    }

    <span class="hljs-annotation">@GetMapping</span>(<span class="hljs-string">"/hello"</span>)
    <span class="hljs-function"><span class="hljs-keyword">public</span> String <span class="hljs-title">hello</span><span class="hljs-params">(@RequestParam(value = <span class="hljs-string">"name"</span>, defaultValue = <span class="hljs-string">"World"</span>)</span> String name) </span>{
        <span class="hljs-keyword">return</span> String.format(<span class="hljs-string">"Hello %s!"</span>, name);
    }
}

In order to start the host app with remote debugging enabled, you need to pass the following options when launching the app:

-agentlib:jdwp=transport=dt_socket,server=y,suspend=n,address=*:5005

There is no limitation on how you pass these options. In this tutorial, you’ll use a run/debug configuration to achieve this.

Right-click anywhere in the file and select Modify Run Configuration. In the dialog box that opens, click Modify options and select Add VM options:

Modify options button

Paste the following into the VM options field:

-agentlib:jdwp=transport=dt_socket,server=y,suspend=n,address=*:5005

The above code passes the -agentlib option to the JVM with the following sub-options:

  • transport=dt_socket: Specifies that the connection to the debugger is made through UNIX sockets.
  • server=y: Listen for a debugger application to attach at the address supplied by the address argument. If server=n is used, the JVM will connect to a debugger in the specified address.
    address=:5005*: Tells the JVM to listen for a debugger at port 5005.
  • suspend=n: This tells the VM to start executing without waiting for the debugger to attach. If suspend=y is used, the VM will suspend execution until the debugger is attached and issues a JDWP command to resume the VM.

The run configuration

This will start the VM with the necessary settings for remote debugging.

Click Apply.

Step 3: Create Remote Debug Configuration

Select Edit Configurations from the configuration menu.

Edit Configurations

Click the Add (+) button and select Remote JVM Debug. This option may also be called Remote depending on your OS and version of IntelliJ.

The Remote JVM Debug menu option

You can give the configuration a name if you want. In the Host field, enter the hostname of the remote application. In this case, it is localhost since the Spring Boot app is running on the same machine.

The remote configuration

Step 4: Run the Application

Select the host app configuration created in step two and start it by clicking the green Run button.

Running the application

The first line of the output should be the following, which denotes that remote debugging is ready:

Listening for transport dt_socket at address: 5005

The output

Step 5: Attach the Debugger

Now you can set breakpoints in your code as you would do with normal debugging:

Setting breakpoint

When you’re ready to start debugging, select the remote debug configuration you created in step three and click the Debug icon. This will attach the debugger to the running Spring Boot process.

Running the debug session

The following message in the console indicates that the debugger has been attached to the application:

Connected to the target VM, address: 'localhost:5005', transport: 'socket'

Depending on where you put the breakpoint, you’ll need to invoke that function to see the debugging in action. If you put the breakpoint in the same place as in the example screenshot, send a request to localhost:8080/hello and the breakpoint should turn on.

Debug in progress

To close the debugger, click the red square at the side of the debug window.

Closing the debugger

As you can see, the process is not entirely straightforward. Also, there are a few problems you may encounter when remote debugging an application. For example:

  • You need admin access to the server to apply remote debug settings, which may not always be possible in a production environment.
  • Remote debugging an application may expose sensitive data like passwords or tokens to developers, which is a significant security breach.
  • The speed of the debugging process may suffer due to latency issues. Issues such as poor network connections might inhibit using more advanced features of otherwise powerful platforms to conduct remote debugging. For instance, IntelliJ recommends avoiding use of method breakpoints in favor of regular line breakpoints.
  • In a multithreaded or microservices application, it may be challenging to get to the root cause of the issue.
  • Setting up remote debugging in an application deployed to Kubernetes means you need to change the Dockerfile and rebuild and redeploy the Docker image every time remote debugging is required. That isn’t necessarily possible in a production environment.
  • The data and insights required to get to the root cause of the issue are still hard to get from remote debugging.

Conclusion

Now that we understand how to set up a remote debugging configuration – in this case for a Spring Boot application in IntelliJ IDEA – you can also see there are a number of limitations to remote debugging itself.

Those issues can run the gamut, such as the need for admin access and the risk to sensitive data. You also need a strong connection to the remote server; otherwise, you will have to try debugging without a lot of more advanced features. On top of that have to keep your source code in sync with your IDE or debugging platform, which high latency could undermine (especially with more complicated apps).

In addition, there are certain situations when standard remote debugging is problematic: Microservice applications that have already been deployed are far more difficult to debug once on the cloud, and adding breakpoints for debugging purposes can cause app failure.

For these and other use cases, something that goes beyond merely remote debugging comes into play, live debugging, such as Rookout. For more about how Rookout can help you with an easier and faster debugging process, check out the documentation or sign up for a freemium account.

Rookout Sandbox

No registration needed

Play Now

Table of Contents
Get the latest news

Low-hanging fruits to quickly reduce cloud costs in 2022

Sharon Sharlin

4 minutes

Table of Contents

A new year is always a good time to check your expenses. One expense that keeps on climbing constantly in many organizations is related to the cloud expenses, expected to expand up to $1 trillion by 2024, according to IDC. While this can be a good thing, indicating the business is scaling and cloud resources are in high demand, there is often a lot of waste coming from inefficient cloud usage, unnecessary SaaS tooling, endless logs, and more.

Let’s take a look at 10 quick ways to reduce cloud costs for 2022:


1. Remember to scale down 

One of the powerful premises of the cloud is the ability to scale. However, after new cloud resources are provisioned – say after a major traffic spike – it’s your responsibility to scale back down once traffic returns to a steady state. If you don’t, those resources are still eating up budget even if they are no longer needed. There are both open-source and SaaS tools that will alert you when thresholds are crossed so that there are no major end-of-quarter surprises.

2. Take advantage of spot instances


Cloud providers maintain large amounts of excess capacity they have available to sell, known as spot instances. For example, an AWS EC2 Spot Instance is an unused EC2 instance that is available for less than the on-demand price – sometimes up to 90% cheaper, which can significantly reduce your EC2 costs.


3. Join a resource swapping service 

Resource swapping is a service designed to make use of your own idle servers. Many people don’t even know these services exist! Check the security aspects first and see if you are comfortable with them, but it could be a good way to claw back some money for resources you aren’t using.


4. Perform cross-organization checks 

Why would you pay for multiple Netflix subscriptions within your family? Now duplicate that logic by 10X or 100X and you have an organization. Many teams are moving fast and adopting tooling, often double-paying unnecessarily for something another team has already paid for. Look at all of the cloud tooling and services being used and cut the duplicates (or the ones not being used at all) – that money is better spent elsewhere!


5. Embrace the digital economy 

New startups often try to take market share by underpricing their solutions. Keep your eyes out and be willing to give these tools a chance. Some of them won’t meet your standards, but many will satisfy your requirements and perhaps even totally replace an expensive tool you already have.


6. Consolidate tooling where possible 

Every company struggles with the balance of purchasing point solutions versus bigger enterprise solutions that can check multiple boxes. Here at Rookout, we are a dev-forward organization and believe in using the best tool for the job. That said, as DevOps and DevSecOps platforms grow – either by adding new features or acquiring new companies – you may find that the new capability from your service provider is actually useful! It will likely be cheaper to turn on additional functionality within an existing tool than adopting a new tool altogether.


7. Embrace open source 

There are so many great tools that are completely free to use, thanks to the wide adoption of open source. You may find that with minimal development effort on your end, you can get the value you need from an open-source project without paying for an entire platform. Look also at the many SaaS vendors in the Dev and DevOps space promoting their free tier, which may address your exact immediate need.


8. Choose the right size 

Think of a car lease. You want to commit to mileage that you know you will stay under, because if you go over the prices increase drastically. This is also true with the cloud. Taking too small of a cloud  package in order to save some money upfront will eventually cost more, as you will end up crossing the threshold and paying extended fees. Size right and save paying the extra charge.


9. Prioritize your data

Data is the new oil they say – so now it’s common to try and save all of the data, all of the time. But this costs a lot of money…which is why having a smart policy for storing your data is a must. APM tools will often allow you to send logs to a low-level aggregation pool, which is a good option for non-critical applications.


10. Embrace Dynamic Observability and Logging

In the past, fetching a piece of data or adding new logs required writing code and redeploying the application. Today, thanks to advances in methodology like bytecode manipulation, it’s possible to retroactively add log lines and fetch data on-demand with the click of a button. Keep an eye out for these dynamic observability and logging tools, which will be on the rise in 2022.


This article was originally posted on ITOpsTimes.

Rookout Sandbox

No registration needed

Play Now

Table of Contents
Get the latest news

Three Things to Know Before You Debug a Spring Boot Application

Karl Hughes | Guest Author

5 minutes

Table of Contents

Debugging is twice as hard as writing the code in the first place. Therefore, if you write the code as cleverly as possible, you are, by definition, not smart enough to debug it. —Brian W. Kernigham

Debugging is hard, and in some places—like in the cloud, production, or Java Spring—it’s even harder. Moreover, debugging isn’t just about finding or fixing bugs in code. It also allows developers to better understand existing codebases by allowing them to see the flow of the entire application when starting work on a project they’ve just joined, or to refresh their memory before beginning to code new features. In situations like these, it’s a smart move to begin by running your code in debug mode to ensure you understand the whole flow of the application.

If debugging is the process of removing software bugs, then programming must be the process of putting them in. — Edsger W. Dijkstra

If you want to produce a stable application, debugging is just as important as programming. In order to debug a Spring boot application, we need to be able to do the following:

  • Control the execution of the code by setting breakpoints.
  • Suspend threads and step through the code.
  • Examine the contents of the variables.

In this article, you’ll learn about three things you should be mindful of before you debug your Spring applications, and how a tool like Rookout can make the debugging easier and faster.

What Are Some Java Features Developers Should Be Aware of When Preparing to Debug?

Before you start debugging your Spring application, you should be aware of some of Java’s features.

  • Remote debugging an application running in production is both risky and tricky. It can affect your application performance, and make it unusable when it hits a breakpoint.
  • Java is increasingly used in distributed environments because it supports multithreading, core networking api, and rich data structures. Debugging a multithreaded application is complicated, as you have to track multiple threads simultaneously.
  • You should know that JVM’s default behavior is to disable debugging. Due to the security concerns posed by opening ports for the debugger to access the server, enabling remote debugging for applications in production isn’t recommended.

To enable the debug mode on the Java Virtual Machine (JVM) for a Maven-based Spring Boot application, you can pass the following command-line arguments to the JVM.

<span class="str">`mvn spring-boot:run -Dspring-boot.run.jvmArguments="-Xdebug -Xrunjdwp:transport=dt_socket,server=y,suspend=y,address=500`</span>

Another option is to provide the following configuration with the Spring Boot Maven plugin in your Maven pom.xml file.

      <span class="tag"><plugin></span>
        <span class="tag"><groupId></span><span class="pln">org.springframework.boot</span><span class="tag"></groupId></span>
        <span class="tag"><artifactId></span><span class="pln">spring-boot-maven-plugin</span><span class="tag"></artifactId></span>
        <span class="tag"><version></span><span class="pln">2.2.6.RELEASE</span><span class="tag"></version></span>
        <span class="tag"><configuration></span>
          <span class="tag"><jvmArguments></span><span class="pln">
            -Xdebug -Xrunjdwp:transport=dt_socket,server=y,suspend=y,address=5005
          </span><span class="tag"></jvmArguments></span>
        <span class="tag"></configuration></span><span class="pln">
        ...
      </span><span class="tag"></plugin></span>

After this, all you need is an IDE with support for debugging.

Three Issues You Should Be Aware of When Preparing to Debug a Java/Spring Application

When you’re going to debug your applications remotely, there are some issues you should plan for ahead of time. We’ll cover three of the big ones now, and will also discuss how tools like Rookout can help overcome these challenges.

Remote Debugging

Java is optimized to be debugged locally, and requires care and attention when debugged in non-local environments. Normally, debugging happens in an IDE, which requires a unique setup on a server. This works well if you’re planning to debug the application locally, but it’s an entirely different situation when you have to debug an application running live in production, serving requests. Advanced live debugging options provided by tools like Rookout can help ease the process of remote debugging in production. With Rookout, you can set non-breaking points without stopping your application, and inspect the code without worrying about application performance.

Debugging in a distributed environment

Debugging your application in a distributed environment can be overwhelming. Imagine how challenging it is to track down and isolate a production issue in an application deployed and running on multiple servers. Thankfully, Rookout’s live remote debugging capabilities can help. You don’t even need to SSH to the remote server or redeploy your application after adding tons of log statements. All you need is to connect your application to the tool, and from there on, you can debug it just like you would locally on your laptop.

Debugging cloud-native applications

It’s common nowadays to containerize your Spring applications and run on top of a container orchestrator like Kubernetes. Debugging non-containerized workloads was never easy, and containerization adds an extra layer of complexity. With a new way of deploying and running your cloud-native workloads, the traditional approach to debugging doesn’t work— third party live debugging tools can help you master this new approach.

  • Kubernetes itself provides several out-of-the-box options to debug an issue with your Pod. This is a list of commands that we can use to troubleshoot an issue with Kubernetes workloads.
<span class="pln">kubectl describe
kubectl logs
kubectl </span><span class="kwd">exec</span><span class="pln">
kubectl port</span><span class="pun">-</span><span class="pln">forward
kubectl debug</span>
  • Another option worth considering is using the debugging capabilities of tools like Skaffold. Skaffold is an open-source tool developed by Google that helps improve developer experience with Kubernetes deployments. It can automate the build, pushing and deploying boilerplate parts of applications deployed to Kubernetes. Not only that, but using the skaffold debug command, it can detect container runtime technologies (for example, JDWP for Java and debugpy for Python applications) and enable debugging functionality on the fly.
  • Telepresence is another option for debugging Kubernetes services locally. Telepresence accelerates the inner development loop for Kubernetes applications by creating a bidirectional network connection between your local development machine and the remote-managed Kubernetes cluster. You don’t have to spend time configuring remote debugging protocols and exposing ports using the kubectl port-forward command to access remote Kubernetes services locally.
  • Rookout delivers painless debugging for your cloud-native workloads. You don’t have to wait or waste time replicating an issue or adding code to debug an issue in an application running live on the production server. Out-of-the-box debugging options provided by Kubernetes can be overwhelming, and it’s hard to know which kubectl command you should be running to get to the root cause of your issue. Live debugging tools like Rookout are worth investing in because they can immediately gather debug data from applications running in your cluster—without having to compromise on security. Moreover, the debug data can be fed to observability tools like Prometheus and Grafana for analysis.

Conclusion

Software delivery goes through multiple iterations of testing, but bugs are inevitable, and debugging is one of your best defenses against them. Classic debugging options are still widely used, but tools like Rookout, that provide seamless live debugging capabilities, are the way of the future.

Rookout Sandbox

No registration needed

Play Now

Table of Contents
Get the latest news

How to Choose Your JVM-Based Language

Josh Hendrick | Senior Solutions Engineer

16 minutes

Table of Contents

When looking for modern languages for software development, you might have noticed that Java isn’t exactly the freshest solution out there. But it’s used in virtually all of IT, from client to server, web to mobile, and even machine learning and analytics. Plus, it comes with a good amount of experience spread throughout its communities. Newly minted JVM languages try to augment Java’s success.

For over a decade now, the ecosystem around Java Virtual Machines (JVMs) has no longer been just about the Java programming language. Authors have implemented a number of ‘JVM languages’ on top of Java’s engine that solve Java’s problems, as well as other well-known languages from other ecosystems. Their JVM implementations allow developers to use their existing skills within the Java ecosystem.

Choosing the best language for a project can be a daunting task, and most companies simply stick with Java. But if you can leverage the advantages that these alternative JVM languages bring and the downsides don’t affect you, it could be worth a shot to stray from Java and try something new.

So, if you want to benefit from the fantastic new language design features that computer scientists have come up with in the last decade and enjoy the full power of the JVM, read on! This article covers today’s most popular JVM languages and helps you choose the best one for your next project.

Java

Let’s start with the classic. While Java is obviously not an alternative to itself, the Java you met 5 to 10 years ago has gotten a facelift. 

Java was created in 1995 by James Gosling for Sun Microsystems. It’s an object-oriented programming language that’s easier to use than C++ and more versatile than Smalltalk. It’s statically typed but doesn’t require manual memory management. Currently, Oracle is the owner of Java and takes care of all updates and support.

Java has had several upgrades in the past few years. Below, we’ll be taking a look at some of the changes Oracle has released since version 8, which came out in 2014. Java received many functional programming features in v8, and the subsequent versions expanded on these.

Java Hello World

Let’s look at a Hello World program in Java:


class Main {

 public static void main(String[] args) {

    System.out.println("Hello, World!");

  }

}

Java has very strict rules about program structure. You have to type everything, and everything must be encapsulated by a class. In this brief example, we can already see that even a small task like printing a string takes quite a bit of boilerplate code to get it done.

Updates to the Java Language

While object-oriented programming was all the rage when C++ and Java came out, functional programming became popular after 2000. Java already received anonymous functions that cut down on the boilerplate consisting of anonymous classes, and the latest changes to Java doubled down on this.

Pattern matching, switch expressions, and record classes are a few of the additions that were a boon for functional programming in Java. Reactive programming, a sub-paradigm of functional programming that focuses on data streams, became a core part of the language as well with the addition of the Flow API.

Java also received a bunch of general usability improvements. The cumbersome collection classes got some factory methods, text blocks now ease the pain of including domain-specific languages like SQL or HTML, and new string methods are now available, to name just three quality-of-life upgrades.

Is Mature Tooling Available?

Java is the best-supported language in the whole ecosystem. If you make your choice based solely on the availability of tools, Java is the clear winner.

It doesn’t just offer you tools for every problem in the development lifecycle, like IDEs, debuggers, or CI/CD servers; it also provides you with multiple alternatives for each tool.

Don’t like NetBeans? Use Eclipse!

TeamCity isn’t your thing? Try Jenkins!

If you want to cover all the steps from building to deploying software, the Java ecosystem has got you covered.

Online Communities

Popular Java Projects

  • Elasticsearch – An online search engine for self-hosting
  • Minecraft – One of the most popular multiplayer 3D games in the world
  • Spring Boot – A backend framework for web development
  • Lottie – A 2D animation framework for mobile platforms
  • Jenkins – A CI/CD pipeline tool for self-hosting

IDE Support

Debugger 

Minimal Supported JVM Version

All versions of the JVM are supported.

Cloud Support

All big cloud providers offer Java SDKs.

Kotlin

Kotlin is probably THE alternative to Java. While it takes functional programming seriously, it offers more practical approaches to everyday development problems. JetBrains, a significant player in the development tooling space, built Kotlin and released it in 2011. Since then, it has grown its user base tremendously. Kotlin owes part of this success to Google, making it an officially supported programming language for Android app development.

Kotlin uses a more advanced type system that includes non-nullable types, saving you from those dreaded NullPointerExceptions. Compared to Scala, which was released earlier, it takes a less functional approach.

Kotlin Hello World

Now, the Kotlin Hello World example:

fun main() {                        

    println("Hello, World!")        

}

Kotlin is more flexible than Java; functions don’t need a class and more of the commonly used functions, like println, are globally available without any namespace clutter.

Kotlin’s Strengths

Google officially supports Kotlin as a first-class language to develop apps for Android. This way, you get modern programming language ergonomics and commercial support from a big player in the mobile game.

Kotlin is higher-level than Java and more practical than Scala. Since it came after Scala and Groovy, it could learn from many of their mistakes. Kotlin’s modern type system can infer many type annotations automatically, which eliminates much boilerplate code without sacrificing safety as dynamic typing does.

It also has coroutines, a programming construct that abstracts threads. These make concurrent programming easier for the masses, which is vital when multi-core CPUs are the standard. In addition, Kotlin makes it easy to integrate with Objective-C and Swift code, a superpower when you’re doing mobile development on multiple platforms!

Overall, Kotlin is a very high-level and pragmatic language that comes with a bunch of quality-of-life improvements that were missing from Java or only suboptimally implemented in alternatives.

Kotlin’s Weaknesses

Kotlin doesn’t have primitive types. Everything in Kotlin is an object, which makes low-level memory layout harder. But since it transparently integrates with Java, you can always write low-level code in a Java file and include it when needed.

Kotlin also has less recruiting potential than Java, but with the official support of Google on Android, this shouldn’t be an issue for long.

Mature Kotlin Tools Available

Kotlin was created by JetBrains, an influential player in the Java development tool ecosystem. Since tooling was their main business before Kotlin, this reflects significantly in the availability and maturity of the developer tools.

Kotlin was designed to be one of the quintessential JVM languages. Kotlin has official support from Google for Android application development, one of the JVM’s biggest platforms. Android Studio, the IDE recommended by Google, comes with out-of-the-box support for Kotlin.

Communities

Popular Projects

  • Ktor – An asynchronous web framework
  • KotlinDL – A deep learning framework
  • Exposed – An SQL framework

IDE Support

Debugger 

Minimal JVM Version

The current version of Kotlin requires Java version 8.

Cloud Support

Kotlin can use the Java SDKs of all major cloud providers transparently.

Scala

Scala is another attempt at bringing a more sophisticated programming approach to the JVM. This time, the primary idea is to merge functional and object-oriented programming. The language is statically typed, but as with Kotlin, the type system requires fewer annotations than Java. So again, if you’re into the whole functional programming thing, Scala might be worth a look. Immutable data, pattern matching, and, with the newest compiler, even a sound type system? What’s not to like!

Martin Odersky, a computer science professor from Switzerland, created Scala in 2004. He previously had added parametric polymorphism to Java with Generics, so he had some serious programming language design cred even before he invented Scala. 

Scala Hello World

Let’s check the Hello World of Scala:

object Hello {

    def main(args: Array[String]) = {

        println("Hello, world")

    }

}

This falls somewhat between the Hello Worlds of Java and Kotlin. On the one hand, it requires us to wrap at least the main function of the program in a class, here a singleton object that gets instantiated automatically. On the other hand, it comes with easier accessible globals than Kotlin does.

Scala’s Strengths

Scala uses a more expressive type system than Java, allowing for fewer type annotations and implicit conversions between types.

A big issue with static type systems is converting types when integrating with multiple libraries and frameworks; implicit conversions let you write conversion code in a separate file so they don’t clutter your business logic.

Integrating functional programming more tightly into an object-oriented language was one of the primary goals of Scala. Higher-kinded types, pattern matching, and operator overloading are vital features. So if you’re into functional programming and prefer a more strict approach, Scala is your go-to language!

Scala also improved on common object-oriented problems. While Java solved multiple inheritances by simply denying them entirely and opting for interfaces, Scala took a different route and added traits, which are more restricted than classes and more flexible than interfaces.

Scala’s Weaknesses

Prolonged compile times plagued Scala for years; this led to significant disputes in the Scala community and to the creation of a new compiler that solved this issue in version 3.0.

The mix of programming paradigms isn’t for everyone and comes with a steep learning curve; the talent pool for hiring is thus much smaller than with Java.

Features like implicit conversions and operator overloading lead to more concise code but can often hide important aspects in other files, leading to errors.

Are Mature Scala Tools Available?

In 2018 a team of developers sat together and founded a tooling working group, which focused on improving the sad state of Scala tooling. Overall, Java and Kotlin have a much better posture here, including software powerhouses like Oracle and Google behind them, and Scala has tried to catch up.

Scala Communities

Popular Projects

  • Akka – A framework that implements the actor model in Scala
  • Play Framework – A backend web framework
  • Quill – A framework for domain-specific query languages

IDE Support for Scala

Scala Debugger 

  • JDB – The Java Debugger 
  • Rookout – A Live Debugger 

Minimal JVM Version

The current version of Scala requires at least version 8.

Cloud Support

Scala has explicit support in Spark but can transparently use the Java SDKs of big cloud providers.

Clojure

Clojure is also on the list of JVM-based languages. If you know Lisp, you understand why the JVM needed one. If not, well, then your programming language interests probably aren’t niched enough. Jokes aside, if you buy into the whole simplicity approach of functional programming that Lisp delivers, Clojure might just be the thing for you.

Rich Hickey, an independent software developer, created Clojure in 2007. Before that, he also built Lisp-like programming languages for other runtimes, like the .Net common language runtime.

The goal of Clojure is to enable Lisp developers to harness the power of the Java ecosystem. It’s a dynamically typed Lisp dialect with a heavy focus on functional programming and immutable data structures to help with concurrent programming.

Clojure Hello World

The Clojure Hello World program:

(ns helloworld.core)

(defn -main

  "Program description"

  []

  (println "Hello, World!"))

Clojure has a very peculiar syntax, called S-expressions. There are only lists of words, grouped together inside parentheses. The first word is the function or operator, while any following words are the arguments. That’s all there is; no infix or postfix notation. Everything is a function, and everything is written in that style.

Clojure’s Strengths

Clojure is the only popular functional programming language on the JVM that uses Lisp syntax. So if Lisp is your thing, you should go with Clojure.

The immutable data structures make concurrent programming much more straightforward. If your problem space is heavy in concurrent computing, Clojure could be easier to maintain. 

Clojure’s Weaknesses

The language is a dynamically typed language, which can be problematic for maintenance in the long run. 

The fact that Clojure has Lisp syntax can throw off new programmers. Functional programming alone is a peculiar type of programming, but Lisp syntax takes this to the extreme. Because of this, you should decide to use Clojure only after serious consideration due to the much smaller talent pool.

While the language’s data structures help write concurrent code, low-level code is more challenging. 

Startup times are slower than other JVM languages as well, and debugging was a pain before version 1.10 because of lousy error messages.

Are Mature Clojure Tools Available?

Yes. While the community is smaller than other languages mentioned here, Clojure has a solid tooling foundation. It probably owes this to the fact that Clojure is a Lisp, or an offshoot of the LISP language, which has a superpower called homoiconicity. This means its code is written in the data structures of that language. While this feature is often seen as a gimmick by creators of non-homoiconic languages, it has always helped Lisps create reliable tools without much effort. You can get a fuller view of it with our introduction to Clojure.

Clojure Communities

Popular Clojure Projects

Clojure IDE Support

Clojure Debugger 

  • JDB – The Java Debugger
  • Debux 
  • Rookout – A Live Debugger 

Minimal JVM Version

The latest version of Clojure requires at least version 8.

Cloud Support

Like all other JVM languages, Clojure can transparently use the Java SDKs of the big cloud providers.

Groovy

Many developers see Groovy as the small sibling of Java. It was conceived in 2003 as a scripting language that helps to iterate faster and rid the JVM of most of the cumbersome boilerplate code that Java requires you to write.

Two of its main features are dynamic typing and that it doesn’t need to be compiled. Groovy owes its big community to the fact that it is the oldest alternative JVM language and has a flatter learning curve than Java.

If you’re a fan of dynamic typing or just need a well-integrated way of scripting your Java software, Groovy is the way.

Groovy Hello World

Groovy’s Hello World example is the shortest:

println "Hello World!"

Here we can already see Groovy’s heavy emphasis on scripting. Every clutter has been removed, there are no semicolons, and even parentheses around function arguments are optional.

Groovy’s Strengths

Groovy is more lightweight than Java since you do not have to type any annotations. It also includes literals for the collection classes, making them very simple.

You can also interpret Groovy and, in turn, use it as a scripting language. This allows for more use cases than Java, like writing and running code without a Java compiler.

Groovy’s Weakness

Dynamic typing is suitable for fast prototyping and small scripts but is hard to maintain if a project gets too big. Groovy offers static typing now, but it’s an opt-in, which requires more discipline from the programmer’s side.

Groovy was one of the first alternative JVM languages and came into being when the JVM didn’t offer any APIs for dynamic programming. This made the execution of Groovy relatively slow. In recent years and with the addition of more and more alternative languages to the JVM, this has changed, and Groovy’s performance is now comparable to Java. But you should keep this in mind when working with older JVM versions.

Before Groovy version 4, one line of code would compile to a different bytecode depending on its context to optimize performance; this could lead to performance regressions in code lines that didn’t change in a new release.

Groovy also didn’t get enough promotion for app development on Android, so the tooling isn’t as fully-fledged as with Kotlin or Java.

Mature Groovy Tooling Available

Groovy is an exciting language when looking at tooling because Gradle, one of the primary build tools for JVM applications, is written and extended with Groovy. Android, for example, uses Gradle as its build environment.

Gradle helped Groovy tremendously to mature. And being able to have complete control over one of the main tools in the Java ecosystem can give your project an edge in terms of build optimizations. The popularity of Gradle also led to all big IDE projects shipping with a Groovy integration out of the box.

Groovy Communities

Popular Projects

  • Gradle – A build tool
  • Grails – A Rails-like web framework

IDE Support

Debugger 

  • JDB – The Java Debugger 
  • Rookout – A Live Debugger

Minimal Supported JVM Version

The first version of Groovy ran on 1.4, which Oracle hasn’t supported since 2013. So, the current recommended version is 8.

Cloud Support

Groovy can use Java libraries transparently and, in turn, all Java SDKs from major cloud providers.

Other Interesting JVM Languages to Check Out

With the creation of GraalVM and the Truffle Language Implementation Framework, Oracle made the JVM more open to other programming languages, resulting in a compiler or runtime for every popular programming language that targets the JVM. This allows you to use the Java ecosystem with a programming language you and your team might be more familiar with.

If you need to integrate with the Java ecosystem while having no Java know-how in your company, these compilers and runtimes might be a viable alternative:

Conclusion

The Java ecosystem is extensive and offers many libraries and frameworks, but the Java language might not be to everyone’s liking. While it has gotten many updates in recent years, especially for functional programming, writing Java code can still be daunting. 

Luckily, there are many alternative JVM languages to make developers’ lives easier. Kotlin, Scala, and Groovy explicitly try to make Java better, with different approaches—some more imperative, some more functional. And with Clojure, there is even a modern Lisp on the JVM!

If these JVM-specific languages aren’t your thing, or if you simply don’t have enough know-how in-house, compilers are also available for every popular programming language; these are great if you merely want to use your favorite language or don’t know enough about Java.

Rookout Sandbox

No registration needed

Play Now